
Guide:Mod Organizer

NOTE
This guide pertains to Mod Organizer in its most contemporary state, which today is officially "Mod Organizer 2". Step does not distinguish between the two.About Mod Organizer[edit | edit source]
Mod Organizer (MO) is an open-source program designed to simplify the installation and management of mods and modding tools for beginners and experts alike. It relies on a virtual file system (VFS) to deploy mods during runtime, which preserves the integrity of all assets in the game's 'real' file-system. This makes enabling and disabling mods very simple and clean and without potential for breaking other mods or the game itself.
Mod Organizer was initially developed by Tannin before he retired as the lead MO creator/developer to became the lead developer of "Vortex" (by Nexus Mods). Since then, several members of the modding community have stepped in to continue development (the birth of "Mod Organizer 2", which Step refers to as simply "Mod Organizer" or "MO").
Features[edit | edit source]
- Support for multiple games
- Mod isolation (game directory is kept clean)
- Profiles (ability to switch between different mod configurations seamlessly)
- Load (plugin) order management (for applicable games)
- File conflict resolution
- BSA unpacking (Bethesda games only) via the BSA Extractor plugin
- Nexus integration for easy mod downloads and mod updates
- GUI support for manual mod repackaging and installation
- Compatibility with BAIN and FOMOD installers
- Savegame viewer with the ability to recognize what mods were used with each saved game
- Archive invalidation (Bethesda games only)
- Customizable mod categories
- Extensive help and tutorials
- Automatic updates
Supported Games[edit | edit source]
- Assetto Corsa
- Blade & Sorcery
- Cyberpunk 2077
- Dark Messiah of Might and Magic
- Darkest Dungeon
- Dark Souls
- Divinity: Original Sin Classic
- Divinity: Original Sin Enhanced Edition
- Dragon Age: Origins
- Dragon's Dogma: Dark Arisen
- Dungeon Siege II
- Enderal
- Enderal Special Edition
- Fallout 3
- Fallout 4
- Fallout 4 VR
- Fallout New Vegas
- Fallout Tale of Two Wastelands
- Kerbal Space Program
- Kingdom Come Deliverance
- Microsoft Flight Simulator 2020
- Mirror's Edge
- Monster Hunter: World
- Morrowind
- Mount & Blade II: Bannerlord
- No Man's Sky
- Oblivion
- Skyrim
- Skyrim Special Edition
- Skyrim VR
- STALKER Anomaly
- Stardew Valley
- The Binding of Isaac: Rebirth
- Witcher 3
- X-Plane 11
- Zeus and Poseidon
Installation and Setup[edit | edit source]
Log in to Nexus and Download the MO Main File. Double-click this file to install MO, referencing the captioned images below.
- It is recommended to install MO and all modding tools outside of UAC-controlled directories! See the System Setup Guide for details.
- If the installer fails to run, ensure that antivirus software is not blocking the executable. If so, add an exclusion for the file and try again.


First-Launch Setup[edit | edit source]
WARNING
Before running MO for the first time, it is important to launch the game itself at least once to establish the registry settings MO uses to recognize the game and its installation path. For many games, this requires launching the game from Steam and quitting the game once the main menu loads.Portable vs Instanced Configurations
Mod Organizer (MO) can be used in two different modes: portable or instanced.
Configuring MO in portable mode, the user must install a distinctly separate copy of MO for each individual game they want to manage. Some prefer this method over instances, since this is how MO has historically worked. There are no known issues with the portable, and the only drawback is redundancy of the MO application itself (which does present a maintenance problem at some point, like when MO needs to be updated or particular themes set, as examples).
With instanced installation, a single MO installation is is used to manage mods pertaining to multiple games and/or mod builds within the same game. Data for each instance is stored under %LocalAppData%/ModOrganizer. Think of instances as an extension to MO's profile system in that the instance acts as a completely independent 'profile' that applies to a specific game (and/or a specific mod list for the same game). While normal MO Profiles allow independent management of game configuration (INI) files, enabled mods, enabled plugins, mod prioritization, etc., they each pertain to the same game and each share the same mod list. This is a significant limitation when one attempts to manage two completely different mod builds for the same game. This essentially combines mods from each build into a single mod list, adding a lot of 'noise' in the form of mods that will never be enabled. Instances allow everything to be partitioned and independent, which mimics the 'portable' installation methodology without the multiple (and redundant) MO installations. Clicking on the ![]() button allows switching instances.
button allows switching instances.
On first launch, Mod Organizer 2 (MO) can be initialized in two modes: portable or instanced. Step highly recommends the 'instanced' configuration (see the sidebox). General instructions for both methods are as follows:
- Launch MO.
- At the Choose Instance window, select New to create a new instance. If you wish to use MO in portable mode, choose Portable and skip to step 4.
- At the next window, choose a name from the dropdown box or type your own name for the instance. It can be anything you want; it does not need to be the name of the game you wish to manage.
- At the next window, select the game you wish to manage. If the game is not on the list, select Browse... and navigate to the game's main folder. Then click OK.
- At the tutorial pop-up, you can choose to view an interactive tutorial on Mod Organizer. First-time users are recommended to do so.
- You may be asked to register nxm links to be handled by MO. This affects the ability for Mod Organizer to download files from NexusMods.com when the user clicks the Download with Manager option on their website. It is generally recommended to choose Yes.


First-Time Setup Tips[edit | edit source]
There are a number of random settings located throughout the application that a user may find useful to setup or change to best suit their tastes or needs. This section is intended to provide some of the more basic tips that users may find desirable.
Enable text descriptions of the toolbar icons[edit | edit source]
A beginner will see all the new buttons and quickly forget which each one does. Adding text below the toolbars describing what the icons actually do alleviates this, and can be enabled by doing the following:
- At the top left of the MO window, click the View menu option.
- Hover the mouse over Toolbars.
- Select Icons and Text.
Change the skin[edit | edit source]
If you are customizing your game with mods, you probably would like to customize the appearance of your mod manager too.
- In the toolbar, click the Settings button.
- Under the General tab, go to the Style dropdown near the top and choose a skin. The dark.qss style is probably the most popular.
- Click OK to apply the new style.
Change the paths[edit | edit source]
By default, MO places all your mod-related files in a single location. Many modders, especially those who have multiple disc drives on their computer, will desire to customize the locations where MO places different files. These locations can be changed in the Settings menu under the Paths tab.
Link to NexusMods[edit | edit source]
In order to download and endorse mods through MO, you must link it to your NexusMods.com account.
- In the toolbar, click the Settings button.
- Go to the Nexus tab.
- Click the Connect to the Nexus button at the top. This will launch your browser and lead you to a page asking you to authorise Mod Organizer.
If you are not already logged in to NexusMods.com, login to your account.
- Click the Authorise button. The website will load and tell you that you have successfully logged into MO, and the Connect to the Nexus button will have changed to Nexus API Key Stored.
- Click OK.
- MO will ask to restart to apply the change. Click Restart.
Updates[edit | edit source]
When an update is available for Mod Organizer (MO), the update button becomes colored ( ![]() ). Simply click the button, and follow any prompts to update. The update button can be found at the top right of the toolbar, or in the menu under Help. If MO fails to detect an update is available, users can manually update by downloading the latest version from one of the available sources and installing/extracting it into the same directory that MO is already located.
). Simply click the button, and follow any prompts to update. The update button can be found at the top right of the toolbar, or in the menu under Help. If MO fails to detect an update is available, users can manually update by downloading the latest version from one of the available sources and installing/extracting it into the same directory that MO is already located.
If a clean install is preferred, while retaining all mod settings, users can do the following to update:
- Navigate to the directory where MO is installed.
- Do one of the following, depending how MO is installed:
- If MO is installed as an instance
- Delete all contents inside the Mod Organizer folder and skip to step 4.
- All the settings will be saved by doing this, since this method stores its files in the
%LocalAppData%/ModOrganizerdirectory.
- All the settings will be saved by doing this, since this method stores its files in the
- Delete all contents inside the Mod Organizer folder and skip to step 4.
- If MO is installed as portable
- Delete all files and folders inside the Mod Organizer folder EXCEPT the following:
- downloads
- mods
- overwrite
- profiles
- webcache
- categories.dat
- ModOrganizer.ini
- nxmhandler.ini
- Delete all files and folders inside the Mod Organizer folder EXCEPT the following:
- If MO is installed as an instance
- Download and install the new version as outlined in the installation instructions at the top of this section.
Toolbar[edit | edit source]

Six buttons are located in the toolbar at top left and three more are displayed at top right. The first six buttons at top left depict an archive, globe, profile, gear, puzzle, and wrench:
- The archive
 button can be used to install a mod by browsing to the mod's archive and opening it. It is not currently possible to install a mod that is not inside an archive with this button.
 - The globe
 button can be used to launch your web browser to the Nexus homepage of the game being managed. In addition to this function, it also sets up MO to download mods for your game via the Download with Manager buttons.
 - The profile
 button can be used to set up different configurations of mods in MO. To learn more, see the Profiles chapter.
 - The gear
 button can be used to manage third-party executables that can be run inside MO. To learn more, see the Third Party Programs section.
 - The tools
 menu can be used to launch various extensible plugins for MO. This currently includes the INI Editor, NMM Import, and Configurator. To learn more, see the Tools section under the MO Plugin Extensibility section.
 - The settings
 button can be used to configure different aspects of how Mod Organizer works. To learn more, see the Settings chapter.
The three buttons at top right include the warning icon, update button, and help menu.
- The warning
 icon tells you if there are potential problems with your Mod Organizer setup. Clicking the warning will information of the potential problem detected in the log at bottom of the MO window. If the icon is grayed out, then all is well.
 - The update
 button is used to update Mod Organizer to the newest version. If it is colored, click to update. If it is greyed out, no update is available.
 - The help
 menu may be used whenever you need help with Mod Organizer. It can be used to tell you more about individual elements of the UI. To use it, click help in the main window toolbar (or the ?-button in each dialog box) and point the cursor on the control you want to know more about. Whenever the button hovers over some element it can tell you more about, it will turn into a question mark. Once it transforms into a question mark, you can left-click to read about that element. The help menu also has a link to the Mod Organizer wiki, a Report Issue button that takes you to Mod Organizer's official bug tracker, and options to launch different guided tutorials.
Tools[edit | edit source]
This tools menu ![]() has two tools by default, but can have more, depending on configured third-party applications:
has two tools by default, but can have more, depending on configured third-party applications:
- BSA Packer - (default) Tool for creating BSAs from relevant assets in installed mods
- FNIS - If Fores New Idles in Skyrim is detected
- INI Editor - A simple tabbed text editor for the game's ini files applicable to the current MO Profile
- Precache Grass - If No Grass In Objects's GrassPrecacher.py is in the MO plugins directory
Section headings such as [Display] can be chosen from the drop-down menu selector at the top of the GUI and that section will show the specified section from the ini.
Left Pane[edit | edit source]

The left pane displays all installed mods, their priority order and enabled status depicted according to the selected profile. Mods can be sorted by name, flag, category, version number, priority, installation date, or Nexus ID.
Selecting multiple mods by Ctrl-clicking allows you to toggle the selection with the 'Spacebar'.
Profiles[edit | edit source]
To change profiles, click on the profile drop-down box and select the desired profile. To learn more about profiles, see the Profiles section.
Columns[edit | edit source]
The left pane has many columns displaying various information about each mod. You can turn off any column you feel you don't need by right-clicking on the column bar and unchecking it.
What do the Flags mean?
If a lightning icon with a green plus sign
The red X ![]() icon appears when an installed mod does not contain any data that Mod Organizer recognizes as valid mod information. In addition, the mod name will be greyed out and italicized. If you want to use the mod despite this fact, you can right-click the mod and select Ignore missing data to remove the flag. This will put an empty textures folder in the mod directory, which MO will see as valid data despite the fact that it does absolutely nothing.
The heart question
icon appears when an installed mod does not contain any data that Mod Organizer recognizes as valid mod information. In addition, the mod name will be greyed out and italicized. If you want to use the mod despite this fact, you can right-click the mod and select Ignore missing data to remove the flag. This will put an empty textures folder in the mod directory, which MO will see as valid data despite the fact that it does absolutely nothing.
The heart question ![]() icon appears when a mod has not been endorsed.
icon appears when a mod has not been endorsed.
- Mod Name - The Mod Name is whatever you call a mod upon installation. Installed mods may be sorted alphabetically by clicking the Mod Name column. To edit a mod's name, single-click twice on the mod's current name and then type in the new name. Alternately, single-click once on the mod's current name, press F2, and then type in the new name.
- Flags - Flags are special icons that inform you about file conflicts between installed mods, current endorsement status, and whether or not Mod Organizer thinks you've installed the mod correctly.
- Category - Sorting by category can be useful if you remember what a mod does, but you can't remember its name. If you have not categorized your mods, this might be less useful.
- Nexus ID - Sorting by Nexus ID can be rather useless, unless you want to find your oldest or newest mod quickly. This, of course, is retrieved from the Nexus ID of the mod, and will show a value of 0 for non-Nexus mods.
- Version - This tells you what version of the mod is installed and whether or not it is up to date. If the version number is in green, it is the latest version. If it is red, there is a new version available. If it is red with a warning
 flag in front of it, the version you have installed is higher numerically but does not appear to match the current version on the Nexus.
- The format of the version number is discussed on this page.
- Installation - This will tell you the date and time the mod was installed.
- Priority - The numerical priority value determines the asset override priority of the mod. If a mod has a high numerical priority value, it will be loaded at higher priority and override any asset conflicts in mods of lower priority. In other words, if two mods have a conflict, the one loaded at higher numeric priority will overwrite the change of lower numeric priority. It is default and recommended to sort by priority ascending, so you can drag and drop mods to change priority.
NOTE
The ordering of mods by drag-drop is possible ONLY IF the Left Pane is using the 'No groups' method AND the the 'Priorities' column is active.As of version 1.2.15 drag/drop can be applied with all groupings. If you don't see this functionality, upgrade your copy of MO.
Filters & Grouping[edit | edit source]
The Filter button applies filters to the Left Pane for easier management. A selector pane will expand from the left-hand side, and from the selection shown you can filter the display by the use of the left mouse button. Multiple filters can be chosen by holding "Ctrl" and left-clicking. To disable the currently selected filter right-click on the highlighted filter name and choose: 'Deselect filter' from the context menu.
The display can also be changed to show the mods grouped into three (3) different styles: 'No groups, Categories & NexusIDs'
Context Menu[edit | edit source]
Right-click or press Shift + F10 in the Left Pane to open the context menu. You can access the All Mods portion alternatively by clicking the Open list options ![]() menu beside the profile drop-down. You will only get the All Mods menu if clicking on a Non-MO mod.
menu beside the profile drop-down. You will only get the All Mods menu if clicking on a Non-MO mod.

- All Mods
- Install Mod... Presents you with the file browser allowing you to install a new mod from an archive. This works exactly the same as clicking the Archive
 button in the toolbar.
 - Enable all visible Enables all mods you have installed in the left pane that are currently visible. If you only want to enable the mods within a specific category, you can open the Filters sidebar, select the category, access the context menu, and click this option.
- Disable all visible Disables all mods currently visible in the left pane. If you only want to disable the mods within a specific category, you can open the Filters sidebar, select the category, access the context menu, and click this option.
- Check all for update Queries the Nexus to look for updates on mods and their endorsement state. It will also change the filter view to <Update>.
- Refresh Refreshes the state of your enabled mods and reassesses conflicts.
- Export to csv... Exports your list of mods to a csv file which can be opened in a spreadsheet application such as Microsoft Excel.
- Install Mod... Presents you with the file browser allowing you to install a new mod from an archive. This works exactly the same as clicking the Archive
- Mod-specific
- Add/Remove Categories Presents you with a drop-down menu where you can add or remove categories for a mod.
- Replace Categories Presents you with a drop-down menu where you can replace the categories for mods.
- Primary Category Sets the primary category visible for a mod that will display in the category column.
- Change versioning scheme Changes the version number system to be compatible with how some modders number their mod versions.
- Ignore update Ignores the current update notice. If the mod updates again, you will be notified.
- Rename Mod... Allows you to rename the mod.
- Remove Mod... Entirely deletes the mod.
- Reinstall Mod... Entirely deletes the mod and then reinstalls from the archive, provided you still have it in your downloads. If the original archive is unavailable, it will tell you so and do nothing.
- Endorse Endorses the mod on the Nexus
- Unendorse Unendorses the mod on the Nexus
- Won't Endorse Removes the not-endorsed flag
 . These mods will be filtered into the <Not Endorsed> category.
 - Endorsement state unknown Non-clickable statement that will remain until you successfully Check all for update.
- Ignore Missing Data Removes the red X flag
 by placing a dummy textures folder inside the mod.
 - Visit on Nexus Opens the mod's page on the Nexus if the Nexus id is known.
- Open in explorer Opens the location of the mod in Windows Explorer.
- Sync to Mods... A feature to sync from Overwrite to installed mods. There must be a duplicate in an installed mod to use.
- Create Mod... When Overwrite has files in it, right-clicking and selecting this option will send all Overwrite files into a new mod that you name.
- Information... Opens the Mod Information dialog box.
Mod Information[edit | edit source]
The Information dialog box for any mod may be accessed by either double-clicking the mod or via the context menu.
Some context on Ini Tweaks
Back a few versions, Tannin introduced a feature called ini tweaks. You may have seen it when you view the information for a mod in the lower left of the of the “INI-Files” tab. Most if not all mods do not have anything listed in there.
Back then, anafuineluva, on 09 February 2013 asked this question, "Does ini tweaks apply over skyrim.ini only? Is there a way to apply them to skyrimprefs.ini too?"
To which Tannin replied, "ini tweaks do not change skyrim.ini or skyrimprefs.ini, they are used instead of them. This means that if a setting exists in ini tweaks, that setting is used over any other ini. In fact, as it stands right now, ini tweaks should even overwrite settings from other ini files, i.e. skse plugins, but I've never tested that."
I have made use the ini tweaks for the settings that S.T.E.P. recommends and also for the fonts entry needed for DARNui in newvegas. I set up a mod with them and installed it, this way when I switch profiles, I just enable it and do not have to worry about editing the ini itself. Nice feature.
To set up a new custom tweak you can do a couple of things. With MO closed create a new empty folder in the Mods directory and restart MO. MO will now show the new folder as a greyed out mos. An easier way to do this in the current version of MO, is if you have an empty overwrite folder to double click on it open it up and right click and create a new folder, you do not need to rename it. Click close to exit the overwrite folder dialog.
With that done you will be able to right click on the overwrite folder and select “Create Mod” from the right click menu. Give it a name that reflects what you want, something like Custom ini Tweaks and press OK. You now have a new mod named Custom ini Tweaks.
In either case double click on the new mod to open the information pane and select the INI-Files tab. Click in the lower left box and right click to get the “create Tweak” fly out menu. Enter the name of the tweak in the dialog that pops up and click OK.
Say you want to do the fonts from Darnified UI. Name the tweak Darn fonts and click OK. Click on the new entry and in the big box on the right copy and paste the whole section from the readme starting with the [Fonts] header. The save button will become active, click it to save the tweak and close the information pane. Re-open the information pane and the new tweak will now have a check box next to it, click it to put a check in the box to activate it.
Another option is if a mod needs a certain entry for the mod to function right you can just open the mod and create the tweak for it there. The
iMaxGrassTypesPerTexure=XX in Skyrim Flora Overhaul by Vurt comes to mind. Don’t forget the [Grass] before it. This way the tweak will be enabled when the mod is.
A condensed version of the above is:
- Double click any mod in your installed mod list (e.g. your RWT2/Skyfalls Patch)
- Open to INI-tab
- In the bottom-left pane, right-mouse click and select Create Tweak
- Enter a name (e.g. Particle Tweak)
- In the Right Pane, type the ini tweak you want to make. E.g.[Particles]
iMaxDesired=6000 - Save and close
- Textfiles - The Textfiles tab show all text files located inside the mod, including readmes and similar documents. It will show a list of all text files at left, which may be viewed by clicking their filenames. You may edit any text file and save using the Save button at the bottom. Note, only ascii format files with the extension *.txt will be shown.
- INI-Files - The INI-Files tab shows any ini files located inside the mod. You may edit any ini file and save using the Save button at the bottom. You can also create a new ini file tweak for the mod by right-clicking in the lower left box and selecting Create Tweak. After entering a name and clicking OK, you can edit your custom ini file with any ini tweaks you desire.
- Images - Images contained in the mod will be able to be seen in the Images tab.
- Optional ESPs - The Optional ESPs tab gives you the ability to move any of the current mod's plugins to an inactive, optional place so that you have the plugin file handy but will not accidentally enable it. Please note that the message that MO normally gives you when enabling a mod with multiple ESPs in it will NOT be triggered by additional plugins located in Optional ESPs.
- Conflicts - The Conflicts tab provides an overview of any and all conflicting files between currently enabled mods. There are three boxes toward the right which tell how many files, consecutively from top to bottom, are (1) in conflict but overwriting other mods, (2) in conflict and being overwritten by other mods, and (3) not in conflict with any other enabled mods.
- Files in the current mod that are overwriting files from another mod in a lower priority position are listed in the top pane. The files in conflict are listed with their paths on the left, and the source(s) of the conflicting files are shown on the right, in order from lowest priority to highest. In order to allow a different mod to provide the conflicting file, you must change the priority position of the current mod to be before the other mod. Alternately, you can right-click any of the conflicting files and select Hide, which will effectively remove the file from the current mod (It actually appends a .mohidden file extension to the file so that it will not be used, but easily restored by going into the Filetree tab, right-clicking, and Unhiding the file). At top right of this pane is the number of all files that are in conflict that this mod is providing.
- Files in the current mod that are being overwritten by other enabled mods in a higher priority position are listed in the bottom pane. The files in conflict are listed with their paths on the left, and the name of the mod providing the conflicting file is shown on the left (there is only one providing mod). You cannot hide any files in this pane. At top right of this pane is the number of all files that are in conflict that another mod is providing.
- Categories - The Categories tab allows you to change the categories for the mod.
- Nexus Info - The Nexus Info tab will show you the text from the Nexus page identified by the Mod ID at top left. Edit the Mod ID if it is incorrect, as otherwise the current version information will also be incorrect. Editing the Version number may be done at top right if incorrect. Clicking the blue Visit on Nexus link should take should open the mod page in your web browser.
- Notes - In the Notes tab you can create notes for the mod. These notes can be seen you hover over the note flag
 for the mod.
 - Filetree - Mod Organizer's (MO) Filetree tab displays all files in the mod, including the MO-generated meta.ini file. MO stores information about the mod inside this meta.ini file, so do not touch it. Using the context menu in Filetree, you can create new folders, open files, rename files/folders, delete files/folders, and hide files/folders. You can also drag and drop files/folders into new locations within the mod. This pane is most useful for making sure everything has been installed to the correct folders, especially when a FOMOD installer fails to install correctly.
- To access the Filetree, double-click an installed mod in the left pane of Mod Organizer and select Filetree at top right (or right-click and select Information from the context menu).
- To hide a file/folder, right-click it and select Hide. To delete a file/folder, right-click it and select Delete. To rename a file/folder, right-click it and select Rename. Alternatively, you can rename a file/folder by double-clicking it. To open a file, right-click the file and select Open. To create a new folder, right-click in the directory level you wish to place the new folder and select New Folder. To move files/folders around within the mod, simply drag and drop them where you want them to go.

Mod Selection & Filtering[edit | edit source]

Mod Organizer (MO) allows multiple ways to find and view mods through grouping, searching, and filtering.
Mod Grouping[edit | edit source]
Currently you can group mods together two different ways via the drop-down menu at the bottom center of the left pane. You can group by categories or Nexus IDs. As a visual hint, the modlist will be placed inside a green box when mod grouping is active. If you wish to turn off mod grouping, select No Grouping from the drop-down menu.
Conflict Highlighting[edit | edit source]
Along with the icons in the flag column showing conflicts, there is also a colour-highlighting applied to mods that are either 'winning' or 'losing' a conflict with the selected mod. ie. mods that have files that are not loaded into the game are shown as green, and those that replace the selected mod's files are shown as red.
Filters[edit | edit source]

Mod Organizer has an advanced filtering system, making mod organization easy. To access it, click the Filter button at the left, bottom corner of the Left Pane. This will pop out a sidebar of different filters in it, which are discussed below. To see all mods again after using a filter, either right-click the filter and select Deselect filter, Ctrl+click the filter, or click in any blank space within the sidebar. Filters may be combined by using the And or Or commands at the bottom of the sidebar. Using the And command will filter through and only show mods that meet all selected filter criteria. Conversely, the Or command will show all mods that meet at least one of the filter's criteria. As a visual hint, the modlist will be placed inside a red box when filters are active.
Pre-Configured Filters[edit | edit source]
- <Checked> - This filter selects mods that you have enabled for your current profile.
- <Unchecked> - This filter selects mods that you have not enabled for your current profile.
- <Update> - This filter selects mods that have a newer version available. It is automatically selected when you Check All for Update.
- <Managed by MO> - This filter selects mods installed into MO.
- <Managed outside MO> - This filter selects Non-MO mods.
- <No Category> - This filter selects mods that do not have a category assigned to them.
- <Conflicted> - This filter selects enabled mods that have file conflicts with other enabled mods.
- <Not Endorsed> - This filter selects mods that have not been endorsed. This includes mods that you have marked as Won't Endorse.
- Filter Categories - After all the preset filters (enclosed in '<>'), the category filters are listed, allowing filtering by 'category' column attribute. Any custom categories will show here as well. To add a custom category, right-click in the Filter sidebar and select Edit Categories. To see more about editing categories, see here.
Namefilter[edit | edit source]
Here you can quickly find your mods by simply typing in parts of their name.
Right Pane[edit | edit source]
Plugins[edit | edit source]

The Plugins tab provides load order management for all ESMs/ESPs installed and enabled. Any mod enabled in the Left Pane containing an ESM or ESP file in the root of the mod will appear here. If the ESM/ESP is in another folder besides the root, it will not be used. If a ESM/ESP has a warning ![]() flag in front of its name, one of its masters is missing, which will be indicated upon hovering over the file. Load order can easily be modified by dragging and dropping into the correct position. For more information, see Priorities.
If you right-click inside the Plugins tab, you will find you have three options:
flag in front of its name, one of its masters is missing, which will be indicated upon hovering over the file. Load order can easily be modified by dragging and dropping into the correct position. For more information, see Priorities.
If you right-click inside the Plugins tab, you will find you have three options:
- Enable all
- Disable all
- Lock load order (please note that this option is only available for active plugins)
Selecting multiple plugins by Ctrl-clicking allows you to toggle the selection with the 'Spacebar'.
The Enable all function will activate all ESMs/ESPs in the Plugins tab. The Disable all option will deactivate all ESMs/ESPs except Skyrim.esm and Update.esm, which are necessary for the game to function. The Lock load order button can be useful if you want certain plugins to be in a specific order. If you select a bunch of mods and lock them in this order, those mods will always end up in that order, although other plugins may slip in between them.

Holding the cursor over any ESM/ESP will provide a tooltip detailing where that esp comes from, the author, a description, the 'Enabled Masters' and where the paper clip is evident, a note about an ini file associated with that ESM/ESP.
- Backup and Restore - Mod Organizer allows you to backup your profile's plugin list (load order) and restore it if the need arises. To backup your profile's plugin list, click the Create Backup
 button at top right of the Plugins tab. Backing this up will NOT backup your INI files, BSA order, or modlist. You can, however, backup your profile's modlist in the Left Pane. To restore a previous plugin list, click the Restore Backup...
  button to the left of the backup button. Upon restoring a backup, any plugins not active at time of backup will be unchecked, and all priority/load-order changes since the backup will be reverted. Also, any new plugins since the backup will be unticked and in alphabetical order at the bottom of your plugin list.
 - Sort - The new Sort
 button at top left of the Plugins tab automatically sorts your plugins using LOOT. Any rules that you have made with the external LOOT application will carry over, but you cannot make rules without installing the main LOOT application.
Archives[edit | edit source]

If a mod contains assets in a BSA file, it will appear in the Archives tab under the mod's name. BSAs may also be unpacked in this tab by right-clicking the BSA and selecting Extract... This will extract the BSA's contents to any folder you choose. When Have MO manage archives is checked in the Archives tab, all BSAs are treated exactly as if they were loose files. That means their priority depends solely on the mod priority order and not the plugin priority order (load order). Additionally, checking a BSA in this mode allows the BSA's assets to be loaded without the need for a dummy plugin. MO's BSA management may be turned off by unticking the Have MO manage BSAs option. If you decide to do this, please note that you will have to load BSAs through dummy plugins. The game's built-in BSA versus loose files rules will apply, and BSAs will be loaded in plugin load order.
Data[edit | edit source]

The Data tab provides an overview of how the Skyrim Data directory is seen when a program is launched through Mod Organizer. The File column tells the name of the file and the Mod column tells us the source of the file. If the name reported in the Mod column is colored red, another mod is active that would have provided the same file, but the mod reported in red is currently overwriting that file. If you hover over the red mod name, it will tell you where the conflicting file is located. Ticking Show only conflicts at the bottom of this tab will cause it to only display files that have conflicts between mods. The context menu in the Data tab accessed by right-clicking provides several useful options. The Open/Execute option will open any file using the default program, or execute the file if it is a EXE or JAR executable application. The Add as Executable option is useful to add applications installed to the data directory quickly to Mod Organizer's list of executables. The Hide option will add a .mohidden file extension to whatever file you are hiding, making it effectively nonexistent. The Write to file option will create a text file listing every single file in your virtual data directory and its source. It will present you with a Save As dialog box, to which you can type whatever name you want for the filename. It is suggested to add a .txt file extension in this window to make opening the file with a text editor simpler. The Refresh option, as well as the big refresh button at the top of the tab, will check for any changes and make sure what you are seeing is current and accurate.

Saves[edit | edit source]
The Saves tab displays your saved games. Hovering the mouse over a save brings up information about that save, including which ESPs used in the save are missing from the current profile. The image at the right shows a save with no missing plugins, the text: Missing ESPs, is just the header, not a statement of the save condition. Right-clicking and selecting Fix Mods... brings up a list of missing ESPs and any mods containing those missing plugins, if available. This provides a simple way to put all your mods for any particular save back into their original configuration.

Downloads[edit | edit source]
The Downloads tab is where all mods downloaded through Mod Organizer are stored. To learn more, visit the Downloading Mods tab.
Settings[edit | edit source]
General Tab[edit | edit source]

- Language - This is a drop-down list of all languages Mod Organizer has. Currently supported languages include English (American), Czech, Dutch, French, German, Japanese, Korean, Russian, Spanish, Turkish, and Chinese (both simplified and traditional).
- Style - Here you can select different skins for Mod Organizer.
- Log Level - This controls what data is printed to the ModOrganizer.log file. Debug is most verbose and useful in solving problems. Info prints less information, but is less useful if encounter a bug. If set on Error level, the log file will only record errors and information on that error will be almost nonexistent. Logging only takes place during the initialisation stage when MO is setting up the VFS. The actual load upon the game is negligible. Tannin made this comment about the CPU activity: There is no CPU impact worth talking about, it's all disk I/O even on debug MO doesn't produce a lot of logs, almost nothing during actual gameplay (most MO activity is during startup and loading).
- Advanced - By ticking Advanced, you are able to change the directories where your downloads, mods, and/or web cache are located on your hard drives(s). This is most useful if you are using a SSD and do not wish to store mod installation archives upon it. It also is useful if you are using multiple Mod Organizer installs and you want them centered on a hub of installed mods.
- User Interface


- Reset Dialogs - If you press the Reset Dialogs button, any place in Mod Organizer where you have selected a Remember Selection box will be reset.
Managing Categories
You may have noticed as you install mods that some of them have an assigned category and some do not. Mod Organizer (MO) provides a limited set of categories out of the box. You can fix this in MO by creating the missing categories.
To configure new categories, go to Settings and click Configure Mod Categories button across the bottom of the General tab. You will get a new window with the existing categories listed. If you cannot see all of the information in this window stretch it by dragging the right or left edge out a bit. You can do the following in this window:
Single-click on a category to select it. The entire row will become highlighted. Double-clicking on ID, Name, Nexus IDs and Parent ID will enable the edit box for each one.
To add a missing category, right-click on any of the existing categories to get a little pop-up that will let you add or remove a category. Click the Add entry. A new blank category will be created above the highlighted category. MO will assign a new ID to the category with "new" as the name for it.
To add the missing Nexus category, go to the Nexus main page, hover over the Files button at the top of the page, and then select Categories to open the Categories page. To get Nexus IDs, hover over one of the categories and somewhere in your browser you should see the link preview. At the end of the link you will see CAT=some number. Example CAT=67 for Abodes - Player Homes. Go back to MO and highlight your new category. Double-click on the Nexus IDs field and enter the number you got in the previous step. Double-click on the name field to rename from "new" to the category name you want to use.
You may have noticed that some categories have nested sub-categories. You can do this from the same dialog as above. To nest a category you have to specify its Parent ID, the last column to the right of the window. For example you create a new category FOOD and MO assigns a number to it (the ID), say 25. Create another category and call it ROTTEN. Edit the Parent ID in ROTTEN to 25. ROTTEN will now be a sub-category of FOOD. If at any time you want to remove a category, highlight it, right-click and select remove.
After you are satisfied with your edits close down MO and navigate to the MO folder and look for a file named categories.dat. Make a copy of this file and keep it in a safe place. If you ever need to re-install MO copy it back to the main folder and your edited categories will be ready to go.- Configure Mod Categories - Pressing the Configure Mod Categories button will bring up the Categories window, which allows you to edit categories. Right-clicking at any point will bring up a context menu allowing you to add a new category at that position or remove the category selected. The ID column to the left displays the category ID number. These should never need to be changed and are mainly for reference purposes in association with other IDs only. However, even farther left, in the column without a title, each category is numbered in the order by which they appear in the list of categories. You can click these and drag and drop the categories into new positions thereby. All other fields may be edited by double-clicking or selecting and pressing F2.

Nexus Tab[edit | edit source]

- Login Info - Entering your Nexus ID and password in this box will allow you to log in to the Nexus without having to type this information every time. Tick the checkmark to cause Mod Organizer to automatically log in. It is stored encrypted inside the Modorganizer.ini file.
- Offline Mode - Ticking the Offline Mode box will cause Mod Organizer not to access the Internet.
- Proxy Settings - Checking the Use HTTP Proxy box will allow Mod Organizer to use your system's proxy settings.
- Associate with "Download with Manager" links - Clicking this button will associate Download with Manager links on the Nexus to the version of Mod Organizer for the game being managed.
- Servers - When you download a mod, Mod Organizer will create a list of known servers as well as their connection speed. Dragging and dropping servers from the left box into the right box will cause those servers to be preferred over the other ones. This is especially useful for Premium users who may wish to specify Premium servers for faster speeds.

Plugins Tab[edit | edit source]
Various settings for some Mod Organizer plugins can be set in the Plugins tab in Settings. To learn more, see the MO Plugin Extensibility section.
Workarounds Tab[edit | edit source]

- Steam App ID - This is the ID Steam uses for the game that Mod Organizer is organizing. Do not touch unless you know for sure it is incorrect. More information can be found here.
- Load Mechanism - This is the manner through which Mod Organizer (MO) is used in your game. Do not touch unless the default mechanism is failing. If set to Mod Organizer, your game will be hooked when run through MO, loading your mods. If set to Script Extender, MO will be loaded as a plugin when launched through the game's script extender loader. If set to Proxy DLL, MO will be loaded through a DLL application extension method, which is a rather big hack, and should be avoided above all.
- NMM Version - This is the version of NMM for which Mod Organizer will set as user agent. It may need to be increased if the Nexus bans any particular version of Nexus Mod Manager from usage.
- Hide inactive ESPs/ESMs - This workaround will hide any inactive ESPs/ESMs. Currently bugged, so do not use.
- Force-enable game files - The base game files, like Skyrim.esm for Skyrim and its related BSAs, will be mandatory if this box is checked. Unchecking this box allows you to disable the base game files, if so desired. This may be useful if using a total conversion mod built on the game's engine.
- Display mods installed outside MO - This option allows you to toggle whether or not all plugin + BSA mods in the real data directory are displayed as Non-MO mods in the modlist. Disabling this feature will only remove mods installed into data, not the official DLC.
- Back-date BSAs - This is an alternative to Archive Invalidation that only works on Skyrim. You must click this if you are running Skyrim and do not activate Archive Invalidation. Otherwise you risk vanilla BSAs overwriting some of your loose files, which is a pain to troubleshoot.
MO Plugin Extensibility[edit | edit source]
Mod Organizer (MO) can be extended in a few ways through plugins. Plugins can be written in C++/Qt or in Python (the Python API is currently slightly limited in comparison to the C++ one and requires users to have Python installed). There are currently three kinds of plugins: extensions, installers, and tools.
Extensions[edit | edit source]
Extensions add to the capabilities of Mod Organizer by adding support for other coding languages.
- Python Proxy - An extension that allows Mod Organizer to run Python plugins if supported. It also allows the user to specify the Python to be used by proxy to Python location.
- Settings:
- enabled (Boolean; default = 'true') - Enables ('true') or disables ('false') the plugin.
- python-dir (text) - Value may be set to any where Python directory root is installed (e.g.,
C:/Python27).
- Settings:
Installers[edit | edit source]
Mods are packaged in many different ways. Installers allow MO to handle these different types of archives.
- BAIN Installer - Installs archives packaged for the Wrye Bash package manager. Right now it does not support wizards.
- Bundle Installer - Proxy installer for archives packaged in another archive (i.e. a FOMOD packaged in a .7z)
- Fomod Installer - Installs archives that use an xml file to describe the installation options. FOMOD stands for Fallout mod as FOMOD archives were originally developed by Fallout Mod Manager.
- Settings:
- enabled (Boolean; default = 'true') - Enables ('true') or disables ('false') the plugin.
- prefer (Boolean; default = 'true') - If prefer is set to false, the installer will not be used as long as the NCC FOMOD plugin ('Fomod Installer external') is working. If prefer is set to true, this installer will handle all xml-based FOMODs. For more details, see the Installing Mods section.
- Settings:
- Manual Installer - Can install almost any package but requires user interaction. Usually the fallback if no other installer works.
- Fomod Installer external - Uses an external tool called NCC based on Nexus Mod Manager to install FOMOD archives. This is slower than the above installer and less well-integrated but much more compatible. This is because NCC supports C# scripts in addition to xml scripts.
- Simple Installer - Allows one-click install for mods packaged in simple data level format.
- Settings:
- enabled (Boolean; default = 'true') - Enables ('true') or disables ('false') the plugin. If disabled, the manual install window will always be presented.
- silent (Boolean; default = 'false') - If set to 'true', then all simple mod archives will be installed automatically, bypassing the Quick Install menu. Setting to false will cause simple mod archives to show the Quick Install menu prior to installation. For more details, see the Installing Mods section.
- Settings:
Tools[edit | edit source]
These plugins usually work similar to stand-alone tools, but they can interfere with the main MO application (e.g., requesting information about the active profile or resolving file names in the virtual directory).
- BSA Extractor - This plugin allows you to extract BSAs in a mod during installation.
- Settings:
- enabled (Boolean; default = 'false') - Enables ('true') or disables ('false') the plugin. Enabling this plugin causes a dialog to appear the next time a mod including a BSA is installed, giving the option to extract the BSA, with another option to remember the setting.
- Settings:
- FNIS Checker - This plugin informs you when you should run FNIS before you start your game.
- Settings:
- enabled (Boolean; default = 'false') - Enables ('true') or disables ('false') the plugin.
- sensitive (Boolean; default = 'false') - If set to 'false', the plugin will conservatively prompt the user that FNIS should be run. If set to true, the plugin will more liberally prompt the user that FNIS should be run (i.e., just about every time a profile element is altered).
- Settings:
- INI Editor - Basic text editor to edit the game configuration. This is a good starting point for anyone interested in developing a plugin using C++.
- Settings:
- external (Boolean; default = 'false') - Determines whether an ini file is ('true') opened by the external Windows text editor, which one is determined by the associated setting. MO by default ('false'), uses this internal "INI Editor" plugin.
- associated (Boolean; default = 'true') - When using an external editor, use the application associated with *.ini files.
- Settings:
- If 'false', uses the Windows "Edit" command, that usually remains set to Windows Notepad, which is default in Windows, for both "Open" and "Edit". The "Edit" choice can still be changed in the Windows Registry.
- NMM Import - Imports mods installed through NMM into MO. Not well tested.
- Preview Base - Provides the ability to preview various types of files.
- Basic Diagnosis Plugin - Checks for problems unrelated to other plugins.
- Settings:
- check_errorlog (Boolean; default = 'true') - Warn when an error occured last time an application was run.
- check_overwrite (Boolean; default = 'true') - Warn when there are files in the overwrite directory. See Overwrite section, for detailed explanation.
- check_font (Boolean; default = 'true') - Warn when the font configuration refers to files that aren't installed. Failure means, current configuration reference a font that is not installed. The font configuration is in Data/interface/fontconfig.txt. Missing fonts result in boxes instead of letters, is typically broken installation of a font replacer mod.
- check_conflict (Boolean; default = 'true') - Warn when mods are installed that conflict with MO functionality - Currently this is only checking for the Nitpick mod, MO already applies the mods fixes.
- check_missingmasters (Boolean; default = 'true') - Warn when there are plugins with missing masters.
- ow_ignore_empty (Boolean; default = 'false') - Ignore empty directories when checking overwrite directory.
- ow_ignore_log (Boolean; default = 'false') - Ignore *.log files and empty directories when checking overwrite directory.
- Settings:
Blacklisted Plugins[edit | edit source]
Here are any plugins that have been blacklisted so that they are not enabled. Plugins may become blacklisted if MO detects that they might have caused a crash. Use the delete key to remove any entries.
Third Party Programs[edit | edit source]
When you use Mod Organizer (MO), all other programs that work with mods (i.e., BOSS, Wrye Bash, Skyrim Launcher, SkyEdit, Creation Kit, etc.) should be started from inside MO. The same is true for all launchers you may use (e.g., SKSE, SBW). Some of the well-known tools for the games supported by MO are automatically detected and added to your list of executables. Other tools must be added manually. A list of automatically detected tools are shown at the end of this page. To launch a game after it has been added to MO's list of executables, select the application from the drop-down list on the top right and click Run.

When you open the Modify Executables dialog by clicking the gears ![]() button, several fields present themselves:
button, several fields present themselves:
- Title - This is the name for this application as displayed in the drop-down menu. You may use whatever name you wish.
- Binary - The full path to the executable to run. Only files that end on .exe or .bat are executables! Other files like .jar or .py require an interpreter (e.g., Java, Python). In those cases you set up the interpreter as the binary here.
- Start In - This is the working directory for the application. You can usually leave this empty. If you're running a .jar/.py file you may have to set this to the path of the .jar/.py file for it to work correctly.
- Arguments - These are command line arguments to be passed to the binary. If arguments are required (and which) depends on the app. If you're running a java application (.jar), you set the binary to your "java.exe" or "javaw.exe" and as the argument use "-jar <name of the .jar file>". If you're running a python application (.py or .pyw) you set the binary to your "python.exe" or "pythonw.exe" and the argument to "<name of the .py/pyw file>".
- Overwrite Steam AppID - This is only required for applications that are distributed via Steam and are not the game itself. The only case I'm aware of is the Creation Kit, and that is set up automatically.
- Close MO when started - If checked, MO will close when the executable is started. Choose based on your preference.
Automatically Recognized Executables[edit | edit source]
Some executables are added to your list of executables if they are installed at their default location. MO does not search the filing system for them. All of them need to be in the game's base directory (i.e. <Skyrim install directory>/). Supported games include Skyrim, Oblivion, Fallout 3 and Fallout New Vegas. Originally BOSS was supposed to be installed inside the data folder. Later that was changed so BOSS got its own directory; therefore, there are two locations MO looks in currently: the BOSS folder inside the game's base directory and the data folder inside the base directory.
Skyrim[edit | edit source]
- Skyrim Script Extender (skse_loader.exe)
- Simple Borderless Window (SBW.exe)
- Skyrim main executable (TESV.exe)
- Skyrim Launcher (SkyrimLauncher.exe)
- Creation Kit (CreationKit.exe)
- BOSS (BOSS/BOSS.exe)
Oblivion[edit | edit source]
- Oblivion Script Extender (obse_loader.exe)
- Oblivion main executable (oblivion.exe)
- Oblivion Mod Manager (OblivionModManager.exe)
- Construction Set (TESConstructionSet.exe)
- Oblivion Launcher (OblivionLauncher.exe)
- BOSS (BOSS/BOSS.exe or Data/BOSS.exe)
Fallout 3[edit | edit source]
- Fallout Script Extender (fose_loader.exe)
- Fallout main executable (fallout3.exe)
- Fallout Mod Manager (fomm/fomm.exe)
- Garden of Eden Creation Kit (geck.exe)
- Fallout Launcher (FalloutLauncher.exe)
- BOSS (BOSS/BOSS.exe)
Fallout New Vegas[edit | edit source]
- New Vegas Script Extender (nvse_loader.exe)
- Fallout New Vegas main executable (falloutnv.exe)
- Fallout Mod Manager (fomm/fomm.exe)
- Garden of Eden Creation Kit (geck.exe)
- Fallout New Vegas Launcher (FalloutNVLauncher.exe)
- BOSS (BOSS/BOSS.exe)
General Application Setup[edit | edit source]
- Click the gears
 button. This opens the Modify Executables window.
 - In the Title field, type in what you want to call the application. This fills in the Title field.
- All the way to the right of the Binary field is a button with an ellipsis with a subtext of "Browse filesystem." Click it. This opens a window where we can browse to the program we want to run.
- Navigate to the folder where the program is installed and select the application. This fills in the Binary field.
- If the program's files are located at the same location as the executable (e.g., TESV.exe is in the Skyrim directory, whereas Reproccer.jar is not in the Java directory), steps 5 and 6 may be skipped, as they would be redundant.
- All the way to the right of the Start in field is a button with an ellipsis. Click it. This opens a window where we can browse to the folder where the program we want to run is located.
- Navigate to the folder where the program is located and select it. This fills in the Start in field.
- Do you need the application to call another file, or input a custom setting? Use the Arguments field for any such needs.
- Do you need to overwrite the Steam AppID? Almost undoubtedly not, but if you do, you can check that option and type in the appropriate AppID in the field provided.
- Do you desire to close MO when you start the program? Only if you are launching the game, most likely. If you do, check the Close MO when started option.
- Click the Add button. This will add the application to your executables list.
- Click Close to close the dialog.
Note: Typical application setup does not require steps 5 through 9.
General Application Troubleshooting[edit | edit source]
Problem: An error occurs launching the application saying, "This application could not be started. Do you want to view information about this issue?"
Probable cause: The application is installed as a mod in Mod Organizer, but is unchecked in the Left Pane modlist.
General Solution: Check the application's mod in the Left Pane modlist.
Problem: Launching an application fails. Mod Organizer locks for a few seconds, but then simply unlocks and does nothing.
Probable cause: The application is installed as a mod in Mod Organizer, but is unchecked in the Left Pane modlist.
General Solution: Check the application's mod in the Left Pane modlist.
Problem: Launching an application produces an "Elevation required" message.
Probable cause: The application being launched requires administrative permissions.
General Solution: Click the Yes button if you trust the application to have administrative privileges.
Problem: The application launches correctly, but fails to use the custom argument(s) entered in the Modify Executables dialog.
Probable Cause: You are launching the application from a shortcut that was created before the custom argument(s) were added.
General Solution:
- Click the Shortcut drop-down menu.
- Remove all shortcuts. If you manually renamed any of them, you will have to delete those shortcuts manually.
- Recreate the shortcuts desired.
Notable Applications[edit | edit source]
BodySlide 2 and Outfit Studio[edit | edit source]
To install BodySlide 2 and Outfit Studio in Mod Organizer:
- Once MO opens the archive, it will not detect any game data.
- Select Set data directory.
- Click OK to install.
- Select Ignore at the prompt.
- The red X flag will appear for the mod in the Left Pane.
- Right-click the mod.
- Select Ignore missing data.
- Enable the mod by ticking its check mark.
BodySlide 2 and Outfit Studio can be added to the list of executable via default procedure:
- Click the gears button. This opens the Modify Executables window.
- In the Title field, type "BodySlide 2 and Outfit Studio" (or whatever else you desire to call it). This fills in the Title field.
- All the way to the right of the Binary field is a button with an ellipsis with a subtext of "Browse filesystem." Click it. This opens a window where we can browse to the program we want to run.
- Navigate to the BodySlide directory and select the "BodySlide.exe" application. This fills in the Binary field.
- Click the Add button. This will add BodySlide 2 and Outfit Studio to your executables list.
- Click Close to close the dialog.
- The same procedure may be used to add the other applications within this mod.
Better Oblivion Sorting Software (BOSS)[edit | edit source]
Better Oblivion Sorting Software (BOSS)

Better Oblivion Sorting Software (BOSS) can be added to the list of executable via default procedure:
- Click the gears button. This opens the Modify Executables window.
- In the Title field, type "BOSS" (or whatever else you desire to call it). This fills in the Title field.
- All the way to the right of the Binary field is a button with an ellipsis with a subtext of "Browse filesystem." Click it. This opens a window where we can browse to the program we want to run.
- Navigate to BOSS's directory (probably
C:/BOSS) and select the "BOSS GUI.exe" application. This fills in the Binary field. - Click the Add button. This will add BOSS to your executables list.
- Click Close to close the dialog.
Please note:
- You may alternatively use the command-line "BOSS.exe" executable in the BOSS directory to bypass the GUI.
BOSS Userlist Manager (BUM)[edit | edit source]

BOSS Userlist Manager (BUM) can be added to the list of executable via default procedure:
- Click the gears button. This opens the Modify Executables window.
- In the Title field, type "BUM" (or whatever else you desire to call it). This fills in the Title field.
- All the way to the right of the Binary field is a button with an ellipsis with a subtext of "Browse filesystem." Click it. This opens a window where we can browse to the program we want to run.
- Navigate to BUM's directory and select the "BOSS Userlist Manager.exe" application. This fills in the Binary field.
- Click the Add button. This will add BUM to your executables list.
- Click Close to close the dialog.
Please note:
- When BUM is first run it will want to set up its configuration information.
- Under Game selection select the appropriate game.
- The Mod Path should be the path to the game's Data folder (e.g.,
C:/Steam/SteamApps/common/skyrim/Data/). - The Masterlist path is the path where the BOSS program is installed (e.g.,
C:/BOSS/Skyrim). - The Boss program is the path to the BOSS executable that is going to be used. (e.g.,
C:/BOSS/BOSS.exe). - Click Save. If asked to configure other installed games repeat the above steps. If the other games are not needed, delete the Mod Path line and BUM will ignore those games.
Creation Kit (CK)[edit | edit source]
The Creation Kit should be automatically detected and added to the executables list upon first startup, so there is no setup necessary. Using the Creation Kit with MO is a bit complicated currently, however, for the following reasons:
- While the Creation Kit is running, files you add to one of the mod directories do not become visible until CK is restarted.
- After saving the changes the esp file is moved to the Overwrite mod.
- The script compiler does not work in Mod Organizer, because it is a 64-bit application. To compile scripts, you will have to temporarily move the scripts to the data directory.

If for whatever reason the Creation Kit is not in your list of applications, you may add it manually by doing the following:
- Click the gears button. This opens the Modify Executables window.
- In the Title field, type "Creation Kit" (or whatever else you desire to call it). This fills in the Title field.
- All the way to the right of the Binary field is a button with an ellipsis with a subtext of "Browse filesystem." Click it. This opens a window where we can browse to the program we want to run.
- Navigate to the game directory and select the "CreationKit.exe" application. This fills in the Binary field.
- Check the Overwrite Steam AppID option and enter the number 202480 in the field beside it.
- Click the Add button. This will add the Creation Kit to your executables list.
- Click Close to close the dialog.
Compiling CK Scripts[edit | edit source]
Since the Papyrus Script Compiler for the Creation Kit is a 64-bit executable which MO cannot handle, you cannot natively compile scripts from the Creation Kit. Applying the Papyrus Compiler Patch for x64 Systems removes that limitation.
Fore's New Idles for Skyrim (FNIS)[edit | edit source]
Fore's New Idles for Skyrim (FNIS)
Fore's New Idles for Skyrim (FNIS) maybe added in this manner:
- Click the gears button. This opens the Modify Executables window.
- In the Title field, type FNIS.
- For the Binary field, browse to your FNIS installation (should be located in
<ModOrganizer>/mods/Fores New Idles in Skyrim - FNIS/tools/GenerateFNIS_for_Users) and select the GenerateFNISforUsers.exe application. - Click the Add button. This will add FNIS to your executables list.
- Click Close to close the dialog.
Please note:
- After closing FNIS, there will be files in Overwrite (essentially a fake mod located at the bottom of the Left Pane if sorted by priority ascending) created by FNIS. Right-click Overwrite and select Create Mod, name it FNIS Output and click OK. This will create a new mod listing in the Left Pane for the FNIS generated files. You will then need to check it to enable it. Each subsequent time you update FNIS behavior, you must open Overwrite and drag the new files back to this mod.
- If you receive a This application cannot be started message, most likely you forgot to enable the mod in the Left Pane.
Free Commander XE[edit | edit source]
NOTE
Using Free Commander DOES NOT provide the user with the exact same view of the VFS as presented to the game.ALL files inside BSAs are still contained within them and not shown as being in the game's "Data" folder. The user will not be seeing a true representation of the VFS by examining the files shown with this tool.
Free Commander XE (FCXE) is an easy-to-use alternative to the standard windows file manager (windows explorer). If you want to see the virtual filing system of MO in action, for example to test if MO is working correctly, you should start FCXE from inside MO. Navigate to your <Skyrim>/data directory. What you see here is what MO exposes to all programs started from inside MO, including Skyrim itself. If you use the windows explorer to navigate to your <Skyrim>/data directory you see only the files of a fresh install of Skyrim. That is under the assumption you have not placed other files/mods in here (manually or using NMM). Note: When you have installed the High Resolution Texture Pack DLC, those files will be installed by Steam in the <Skyrim>/data directory. The same is true for the other three non-free DLC's. When you navigate to the directory where the regular skyrim.ini and skyrimprefs.ini files reside and open these files you also see the contents you configured using MO. Its also possible to edit both ini files.
NOTE
For technical reasons, you cannot use Windows Explorer or programs based on Windows Explorer for this. You can use other alternative file managers like Total Commander (TC) however. FCXE and TC have been tested and work flawlessly.MO only supports 32 bits programs, so make sure you install the 32 bits version of FCXE.

To set up Free Commander XE to work with MO:
- Click the gears button. This opens the Modify Executables window.
- In the Title field, type in "Free Commander XE" (or whatever else you want to call it). This fills in the Title field.
- All the way to the right of the Binary field is a button with an ellipsis with a subtext of "Browse filesystem." Click it. This opens a window where we can browse to the program we want to run.
- Navigate to your FreeCommanderXE directory and select the "FreeCommander.exe" application. This fills in the Binary field.
- Click the Add button. This will add Free Commander XE to your executables list.
- Click Close to close the dialog.
LOOT[edit | edit source]
To set up LOOT to work with MO:
- Click the gears button. This opens the Modify Executables window.
- In the Title field, type LOOT.
- For the Binary field, browse to your LOOT installation and select the LOOT.exe application.
- In the Argument field you can', if you use LOOT for more than one game, add these switches : --game=<name> where <name> is either Skyrim, FalloutNV, Fallout3 or Oblivion
- Click the Add button. This will add LOOT to your executables list.
- Click Close to close the dialog.
Now each time you want to run LOOT, simply select it from the drop-down menu at top right and click Run. NOTE: Although the internal 'Sort' button is LOOT, it lacks the report window and metadata editing features.
Simple Borderless Window (SBW)[edit | edit source]

To set up Simple Borderless Window (SBW) to work with MO:
- Click the gears button. This opens the Modify Executables window.
- In the Title field, type in "SBW" (or whatever else you want to call it). This fills in the Title field.
- All the way to the right of the Binary field is a button with an ellipsis with a subtext of "Browse filesystem." Click it. This opens a window where we can browse to the program we want to run.
- Navigate to your Skyrim directory and select the "SBW.exe" application. This fills in the Binary field.
- Check the Close MO when started option. This causes MO to close upon launch of SBW.
- Click the Add button. This will add SBW to your executables list.
- Click Close to close the dialog.
Please note:
- The skyrimprefs.ini for each profile must be edited, changing the "bFull Screen" value to 0, for Skyrim to launch in windowed mode.
- The picture shows when you alt-tab in Skyrim. While in game you will not see the tray or anything else. It will be windowed mode but without the borders: essentially Fullscreen.
Skyrim Script Extender (SKSE)[edit | edit source]
Skyrim Script Extender should automatically be detected and added to executables. If for whatever reason it is not detected, it may be added by doing the following:

- Click the gears button. This opens the Modify Executables window.
- In the Title field, type in "SKSE" (or whatever else you want to call it). This fills in the Title field.
- All the way to the right of the Binary field is a button with an ellipsis with a subtext of "Browse filesystem." Click it. This opens a window where we can browse to the program we want to run.
- Navigate to your Skyrim directory and select the "skse_loader.exe" application. This fills in the Binary field.
- Check the Close MO when started option. This causes MO to close upon launch of SKSE.
- Click the Add button. This will add SKSE to your executables list.
- Click Close to close the dialog.
Please note:
- SKSE may not be installed as a mod via MO. You may, however, install the scripts via MO to keep your data directory clean (provided that you haven't changed MO's load mechanism to Script Extender).
- SKSE plugins may be installed and used via MO (provided that you haven't changed MO's load mechanism to Script Extender).
SKSE Troubleshooting[edit | edit source]
Problem: SKSE fails to launch, producing a "Couldn't read arguments" error popup message.
Probable Cause: You have set an incorrect argument for SKSE.
General Solution:
- Click the gears button. This opens the Modify Executables window.
- Select SKSE from the top window.
- Remove or fix the incorrect argument. Valid arguments for SKSE:
- -h
- -help
- -editor
- -priority <level>
- -altexe <path>
- -altdll <path>
- -crconly
- -waitforclose
- -fpslimit <max fps> (requires FPS Limiter for FSX mod)
- -v
- -msinfo
- -noskiplauncher
- -launchsteam
- -affinity <mask>
- -forcesteamloader
- Click the Modify button to save changes.
- Click the Close button to exit the dialog.
- Any SKSE shortcuts set up while this incorrect argument was in place will need to be removed and recreated.
SkyProc Patchers[edit | edit source]
SkyProc Patchers such as ASIS, Automatic Variants, Reproccer and similar, are Java executable "jar" files and not actual executables. To add any SkyProc program to executables:
- In the Right Pane, go to the Data tab.
- Locate the SkyProc Patchers directory and expand to the SkyProc program you want to use.
- Right-click the .jar file and select Add as executable.
- Enter a name and finish.
Please note:
- 32-bit Java is required to run SkyProc Patchers.
- You may be asked to select the Java executable. It wants the "javaw.exe" file typically located inside
.../Java/jre7/binin your Program Files directory. - Instead of adding as executable, you may simply execute it from the Data tab by right-clicking and selecting Open/Execute. This is useful if you run all your patchers via SUM and you find yourself in need of running one of them manually.
- BOSS may be bypassed by adding
-nobossto the end of the Arguments field in Configure Executables.
SkyrProc Troubleshooting[edit | edit source]
Problem: Patcher failing due to esps sorted incorrectly (throws an error saying something akin to missing master).
Probable Cause: You have an esp in your load order which requires a master which currently is lower in your load order than the esp requiring the master.
General Solution:
- Place the esp in the correct spot (below the master file it requires).
- Add
-nobossto the end of the Arguments line for the patcher in MO. - Run the patcher and patch as normal.
- alternatively:
- Place the esp in the correct spot (below the master file it requires).
- Launch SUM (install it if you do not have it).
- Change SUM settings so that BOSS doesn't run.
- Run the patcher through SUM and patch as normal.
Problem: Patcher failing, throwing an error saying it cannot find something, or some other random error.
Probable Cause: Java is out of date.
General Solution:
- Download the latest Windows x86 offline version from here if running Windows XP or from here if running Windows Vista or higher.
- Install it.
Problem: Patcher failing, throwing an error related to memory.
Probable Cause: Java is running out of memory to perform the operation.
Possible Solution:
- Launch SUM (install it if you don't have it).
- Allocate more memory in the Other Settings panel
- Run the patcher through SUM and patch as normal.
- ... and/or
- Close any java application. The files java.exe and javaw.exe cannot be opened.
- Download this 4GB patch.
- Extract it anywhere and execute the "4gb_patch.exe" file.
- Find your java (32-bit) bin folder (something like
C:/Program Files (x86)/Java/jre8/bin). - Apply the patch in both java.exe and javaw.exe files.
- Launch SUM (install it if you do not have it).
- Allocate more memory in the Other Settings panel
- Run the patcher through SUM and patch as normal.
xEdit (TES5Edit, TES4Edit, FNVEdit & FO3Edit)[edit | edit source]
xEdit (TES5Edit, TES4Edit, FNVEdit & FO3Edit)
To add xEdit to executables:
NOTE
The easiest way to use xEdit is to rename it to match the editor associated with the game, e.g. TES5Edit for Skyrim. The attached graphic shows the installation of xEdit using this methodHowever since MO can be used for all the Bethesda games the following method can be used where only the Arguments field is changed.
- Click the gears button. This opens the Modify Executables window.
- In the Title field, type "TES5Edit" (this would be for Skyrim(TES5) or you could provide any name you like). This fills in the Title field.
- All the way to the right of the Binary field is a button with an ellipsis with a subtext of "Browse filesystem." Click it. This opens a window where we can browse to the program we want to run.
- Navigate to the directory that xEdit is installed in and select the "xEdit.exe" application. This fills in the Binary field.
- In the Arguments field add -tes5 -edit. (tes5 = Skyrim, tes4 = Oblivion, fo3 = Fallout 3 & fnv = Fallout NV) <<< Note: -tes5 seems to make xEdit look for Oldrim. Should add SkyrimSE argument if someone knows it.
- Uncheck the Close MO when Started option
- Click the Add button. This will add xEdit to your executables list.
- Click Close to close the dialog.

Please note:
- If Backup Plugins is checked in TES5Edit, files are saved to original file location, overwriting them, and a backup is created in Overwrite inside the TES5Edit Backups folder (please note that this behavior is different from older versions of MO, in which case no matter what, the modified file was saved in Overwrite).
- If Backup Plugins is unchecked in TES5Edit, files are saved to original file location, overwriting them without creating backups (please note that this behavior is different from older versions of MO, in which case the modified file always went to overwrite).
Wrye Bash[edit | edit source]
Wrye Bash comes in two variants: standalone and Python. The standalone version may be added to MO like any other program, however you have to set python.exe/pythonw.exe (32-bit) as the executable and Wrye Bash as the argument for the Python variant.

To add Wrye Bash standalone to executables:
- Click the gears button. This opens the Modify Executables window.
- In the Title field, type in "Wrye Bash" (or whatever else you decide to title it). This fills in the Title field.
- All the way to the right of the Binary field is a button with an ellipsis with a subtext of "Browse filesystem." Click it. This opens a window where we can browse to the program we want to run.
- Navigate to and select "Wrye Bash.exe" located, most likely, in the "Mopy" folder where you installed it. This will fill in the Binary field.
- Having trouble finding it? It should be in the "Mopy" directory inside your game directory.
- Click the Add button. This will add Wrye Bash to your list of applications.
- Click Close to close the dialog.
To add Wrye Bash Python to executables:
- Click the gears button. This opens the Modify Executables window.
- In the Title field, type in "Wrye Bash Python" (or whatever else you decide to title it). This fills in the Title field.
- All the way to the right of the Binary field is a button with an ellipsis with a subtext of "Browse filesystem." Click it. This opens a window where we can browse to the program we want to run.
- Navigate to and select "pythonw.exe" inside your Python directory (should be located in
C:/Python27). This will fill in the Binary field. - All the way to the right of the Start in field is a button with an ellipsis. Click it. This opens a window where we can browse to the folder where the program we want to run is located.
- Navigate to the directory where Wrye Bash was installed and select it (default location is
.../Steam/SteamApps/common/skyrim/Mopy). This will fill in the Start in field. - Leave that all open, but now go into Windows Explorer and find your Wrye Bash directory and enter it. You should see a file called "Wrye Bash Launcher.pyw" inside that folder.
- Press down the Shift button and hold, at the same time right-click the "Wrye Bash Launcher.pyw" file. The context menu should appear.
- Select Copy as path from the context menu. It may be hard to locate, but it will be about in center of the context menu. If you can't find it, try pressing Shift + right-click again, and it should appear. This will copy the path to the "Wrye Bash Launcher.pyw" to your clipboard.
- Now paste the path that you just copied to your clipboard into the Argument field. The argument should now look something like this:
"C:/Games/Steam/SteamApps/common/skyrim/Mopy/Wrye Bash Launcher.pyw" - Click the Add button. This will add Wrye Bash to your list of applications.
- Click Close to close the dialog.

Please note:
- If you start Wrye Bash from MO (add it as an executable), it will recognize the plugins (esp, esm) from MO but Wrye Bash will treat them as if the mods had been installed manually.
- Disabling Wrye Bash's Auto-Ghost functionality when launched through Mod Organizer stops all ESP files being moved from their respective folders to the Data folder.
- Some versions of Wrye Bash (e.g., Wyre Flash for Fallout 3) do not have a standalone version, in which case the Python setup is necessary.
Shortcuts[edit | edit source]
Mod Organizer (MO) allows the user to create shortcuts to launch applications through it. Shortcuts may be placed on the Start Menu, Desktop, or the Toolbar within MO itself.

To place a shortcut on the Desktop (or to remove it if it is there already):
- Select the application from the executable drop-down menu.
- Click the Shortcut drop-down menu.
- Select Desktop.
To place a shortcut in the Start Menu (or to remove it if it is there already):
- Select the application from the executable drop-down menu.
- Click the Shortcut drop-down menu.
- Select Start Menu.
To place a shortcut on the Toolbar (or to remove it if it is there already):
- Select the application from the executable drop-down menu.
- Click the Shortcut drop-down menu.
- Select Toolbar.
WARNING
Any arguments, lack of arguments, or other options changed in the Configure Executables dialog will not affect shortcuts made prior to these changes. For the shortcut to receive the new settings, you must delete the shortcut and create it again.Changing Shortcut Icons[edit | edit source]
By default, Start Menu and Desktop shortcuts created through Mod Organizer display its icon and not the icon of the application to be launched. This can be changed by altering the shortcut's icon settings. To do so:
- Right-click on the shortcut to be modified and select Properties.
- Click the Change Icon... button.
- Click Browse...
- Browse to the location of the application and select the application (or relevant icon image).
- Click Open.
- Click OK.
- Click Apply.
- Click OK.
Profile-Specific Shortcuts[edit | edit source]
It is possible to make a shortcut profile-specific. This only works for Desktop and Start Menu shortcuts. If this is done, it will only run in the profile specified. To create a profile-specific shortcut:
- Create the shortcut to the application as outlined above.
- Right-click on the shortcut created and select Properties.
- The Target field will include two strings encompassed by quotes like this:
"<ModOrganizer>/ModOrganizer.exe" "<ApplicationFolder>/Application.exe"- Between those two strings add
-p "Name of Profile"replacing Name of Profile with the name of the profile to be used. - The Target field should now look like this:
"<ModOrganizer>/ModOrganizer.exe" -p "Name of Profile" "<ApplicationFolder>/Application.exe"
- Between those two strings add
- Click Apply.
- (Optional) Rename the shortcut in a manner that will indicate which profile it will work on.
- Click OK.
INI settings[edit | edit source]
MO takes copy of the game INI files upon first launch. Any successive changes to the default game INI files will not be reflected in MO. To edit the INI files, open the Puzzle menu and select either the Configurator to launch a GUI INI editor or click INI Editor to launch a text based ini editor.
Backup and Restore[edit | edit source]
Mod Organizer allows you to backup your profile's modlist in the Left Pane and restore it if the need arises. To backup your profile's modlist, click the Create Backup ![]() button to the right of the profile drop-down menu. Backing this up will NOT backup your INI files, BSA order, or plugin list (load order). You can, however, backup your profile's plugin list in the Plugins tab in the Right Pane. To restore a previous modlist, click the Restore Backup...
button to the right of the profile drop-down menu. Backing this up will NOT backup your INI files, BSA order, or plugin list (load order). You can, however, backup your profile's plugin list in the Plugins tab in the Right Pane. To restore a previous modlist, click the Restore Backup... ![]() button to the right of the profile drop-down menu. Upon restoring a backup, any mods not active at time of backup will be unchecked, and all priority changes since the backup will be reverted. Also, any new mods since the backup will be unticked and in alphabetical order at the bottom of your modlist.
button to the right of the profile drop-down menu. Upon restoring a backup, any mods not active at time of backup will be unchecked, and all priority changes since the backup will be reverted. Also, any new mods since the backup will be unticked and in alphabetical order at the bottom of your modlist.
Downloading mods[edit | edit source]
Mods may be downloaded via Mod Organizer (MO) by clicking the Download with Manager buttons on the Nexus mod sites once set up to do so (see step 5 in the Initial Setup section under the Installation tab). Mods downloaded through MO will appear in the Downloads tab in the Right Pane. Mods can also be downloaded manually and subsequently installed to MO using the Archive ![]() button in the toolbar.
MO collects meta information after the download has completed, including the mod's name, version, and Nexus ID. When a downloaded mod is installed, the meta information determines the name that MO suggests for the mod. Once installed, the Nexus ID and version number is imprinted on the installed mod's information. If meta information has not been collected for a downloaded mod, a warning
button in the toolbar.
MO collects meta information after the download has completed, including the mod's name, version, and Nexus ID. When a downloaded mod is installed, the meta information determines the name that MO suggests for the mod. Once installed, the Nexus ID and version number is imprinted on the installed mod's information. If meta information has not been collected for a downloaded mod, a warning ![]() icon will appear in front of the mod in the Downloads tab. To attempt to retrieve the information:
icon will appear in front of the mod in the Downloads tab. To attempt to retrieve the information:
- Right-click the downloaded file in the Downloads tab.
- Select Query Info.
- If presented with a window asking you to choose between two, or more, possible Nexus IDs, select the correct one (normally the higher number). If neither are correct, cancel.
- If presented with a window asking you to enter the Nexus ID, enter the correct number (Nexus IDs are the number at the end of URL after nexusmods.com/mods).
- If presented with a window asking you to choose the correct file, choose the correct file. If the correct file isn't there, select cancel.
In many cases the meta information collection will fail despite following these steps. This is caused by one of the three following problems:
- The file has not been assigned a version number by the mod author.
- There are more than 30 files assigned to the mod, and none of the 30 detected by MO were the correct file.
- The file doesn't exist on the Nexus.
NOTE
You may notice messages like: 1 orphaned meta file will be deleted. This is because of a temp file used as a placeholder while the download is happening. These files are removed and replaced with the correct filename and MO is just saying the meta.ini it assigned that temp file will be removed.The meta information can at any time be edited manually by opening the <modname>.meta file in the downloads folder. Using any text editor, like Notepad, simply fill in the details as you would with any other ini file. This information has no bearing on the functionality of Mod Organizer, other than telling it where the mod came from. If you leave the <modname>.meta empty MO will still work normally.
NOTE
If you merge two or more mods into one mod in the installation process, and then later uninstall that mod, the <modname>.meta file for only one of those mods will be updated and you may see mods listed in the Downloads tab as still installed.
Please note:
- The globe
 button can be clicked to enable MO to download a file via the Download with Manager buttons on the Nexus.
 - You can select preferred servers for downloading mods inside Settings at the bottom of the Nexus tab. Simply drag and drop your preferred servers into the box on the right (please note that these servers are only identified upon first download of a mod). This is useful if you have a premium account, as you can give premium servers higher priority.
- If a file says that it is Done in the Downloads tab, it has finished downloading, but is currently not installed. If a file says that it is Installed in the Downloads tab, it has been installed. If a file says that it is Uninstalled in the Downloads tab, it has been uninstalled.
- Files in the Downloads tab may either be deleted or removed from view. Deleted files are moved to the Recycle Bin. Files that have been removed from view still exist in MO's downloads folder, but will not appear in MO's Downloads tab.
- Files that have been removed from view may again be seen by ticking Show Hidden at bottom left of the Downloads tab.
- Mods downloaded by MO are stored in the "downloads" folder inside the ModOrganizer directory.
- Manually downloaded mods do not automatically appear in the Downloads tab in MO. If you want the downloaded mod to appear in the Downloads tab, you must manually copy it to MO's downloads folder. You may then follow the steps explained above to collect meta info for the mod.
- Meta information gathered by MO may not necessarily be correct. If it is incorrect, following installation you may manually enter the correct Nexus ID and/or version number in the Nexus Info tab.
UI Settings[edit | edit source]
(Check the Settings section for more details).
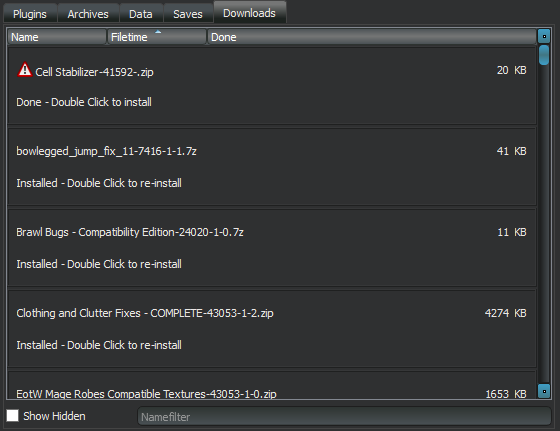 Neither Compact Download Interface or Download Meta Information.
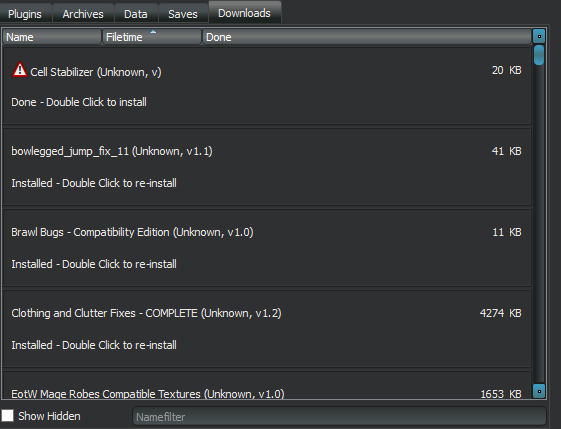 Only Download Meta Information ticked.
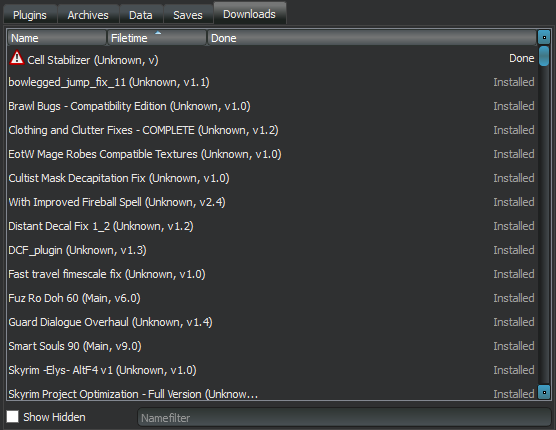 Compact Download Interface or Download Meta Information.
Troubleshooting[edit | edit source]
Problem: When I click the Download with Manager button on the Nexus, nothing happens.
Possible solutions: There are many reasons why this may happen. Please try these possible fixes:
- Click the globe button.
- Go to the Nexus tab in Settings and click the Associate with "Download with manager" links button.
- Go to your ModOrganizer directory and run the nxmhandler application. If the program is pointing to Mod Organizer, click the Register Active button, click yes at the prompt, and close. If the program is not pointing to Mod Organizer, right-click in the window and select Add, select the game you are handling, browse to the appropriate ModOrganizer.exe application, click OK, click the Register Active button, click yes at the prompt, and close.
- If you are using Google Chrome:
- Locate the "Local State" file (enter
%LOCALAPPDATA%/Google/Chrome/User Data/in the Windows Explorer address bar). - Open the file in a text editor such as Notepad while Google Chrome is closed.
- Search for "nxm" (Click Ctrl+F and enter
nxm). - Delete the line that says "nxm": false (if true, still delete the line).
- Save the file.
- Next time you click the Download with Manager button, Chrome should pop-up a dialog asking to launch the application registered for nxm links. Click Launch.
- Locate the "Local State" file (enter
- If you are using Firefox, open Firefox, and inside Options, go to the Applications tab. Search for nxm and point it toward the nxmhandler application located inside the ModOrganizer directory if the option exists.
WARNING
The above method will no longer work with the latest versions of Chrome.
Problem: Attempting to install a downloaded mod file produces a "None of the available installer plugins were able to handle that archive." message.
Probable Cause 1: The downloaded file is corrupt.
General Solution 1: Re-download the file.
Probable Cause 2: The archive is packed using the STORE/DEFLATE compression method.
General Solution 2: Unfortunately there is a problem with the 7Zip library supplied by 7Zip and it refuses to manage that compression method. The only recourse is to manually unpack the archive, the 7Zip Manager does handle this archive properly, and repack it using another compression method.
Managing for Multiple Games[edit | edit source]
When first run, Mod Organizer (MO) sets up an association with the NXM link in Nexus network to handle the download with manager button on the Nexus network. This association, unfortunately, is all encompassing and steals the association from Nexus Mod Manager. MO only supports Oblivion, Fallout 3, Fallout NV and Skyrim while Nexus Mod Manager supports more games. If you are using Nexus Mod Manager to manage other games that MO does not support you cannot use the download with manager button as it is associated with MO. The solution to this problem is provided in the ModOrganizer folder in the form of a program called nxmhandler.exe. This little program will allow you to associate another application to handle nxm links alongside MO. To set up an association to another game and another MO do the following:
- Navigate to the ModOrganizer folder and look for nxmhandler.exe. Double click on it to run the program.
- In the nxm handler window you should see all the associations assigned to MO.
- In a blank area of the window, right click and select Add. This will open a new window with a supported games box and a file browser button.
- Select "Other" from the supported games section.
- Press the button to open the file browser and navigate to the new client that will handle this association (Nexus Mod Manager for example, Some-path/Nexus Mod Manager/NexusClient.exe) and click open. You will be returned to the Add dialog. Click OK to close the Add dialog
- You should now have an entry with "other" as the supported game and the path to NexusClient.exe.
- Now we need to determine the name of the game to associate with NMM.
- Navigate to the Nexus network game list. Scroll to the name of the game you want to use and click on the link. When the home page of the game you want to use is loaded, look at the URL in the browser address field. At the end of the URL there will be the name of the game. An example for Dragon Age 2 would be https://www.nexusmods.com/dragonage2. We are interested in the last part, dragonage2. Highlight it and copy it to the Windows clip board.
- Go back to the nxmhandler window and double-click on "other" in the supported games section. This will allow you to edit the name. Delete "other" and paste the contents of the clipboard in its place. You should now have dragonage2 as the game and the path to NMM. Click close to finish. You should now have an association to Dragon Age 2 that will work alongside what is associated with Mod Organizer.
- If you need to associate multiple games to NMM you can just find the name of the game in the URL as described above and run nxmhandler.exe again. Double-click on the supported game entry that point to NMM and add it to the name. Separate the names with a comma. This last one is untested, but when investigating this my results suggest that this is to be true.
NOTE
The actual settings created by NXMHandler are stored in an INI inside the top directory of your first MO installation only.Installing, Updating, & Uninstalling Mods[edit | edit source]
Installing[edit | edit source]
Mod Exists

The Mod Exists dialog box appears whenever you try to install a mod with the same name as an existing mod. This normally occurs when installing optional files for mods or updating a mod. The Merge button typically should be chosen when installing optional files that are add-ons to the mod. This simply adds the files to the existing mod, overwriting any existing files. The Replace button generally should be chosen when upgrading a mod to a new version containing all required assets. This deletes all files in the mod and installs the new files in its place. The Rename button allows you to install the mod under a different name, allowing you to keep the file contents separate from the main mod, or enabling you to install different versions of the same mod. The Cancel button stops installation. Ticking the Keep Backup checkmark in combination with either the Merge or Replace options will create a backup of the mod before installing the file. To restore the backup:
- Right-click the mod and select Open in explorer.
- Delete the mod folder highlighted.
- The mod folder directly beneath the folder you deleted will have the same name with "_backup" appended to it. Rename that folder to the original mod's name, removing "_backup" from it.
- The mod has now been successfully restored from backup. There used to be a context menu option to perform this operation, but it appears to be missing from the current version.
There are four ways to begin installing a new mod:
- Download the mod archive through Mod Organizer (MO) from Nexusmods.com, and then once it has finished, install by double-clicking the file in the Downloads tab in the Right Pane.
- Click the Archive button in the toolbar, browse to the mod archive, select it, and click Open.
- Right-click within the Left Pane, select Install Mod... from the context menu, browse to the mod archive, select it, and click Open.
- Install a mod from the Steam Workshop by running the game launcher through Mod Organizer (see Installing mods from the Steam Workshop guide below).
When you open most archives, the Name box will show you the name of the mod as parsed from the meta info collected when it was downloaded. If no meta info was collected, it will display the filename of the archive minus the appended Nexus ID and version number. You can rename the mod to anything you desire or keep the name. To speed up the naming process, you can click the down arrow which will present a drop-down box with suggestions of other names based on other mods you've installed sharing the same Nexus ID, the name of the mod archive itself, the name of the mod archive with the Nexus ID and version number attached, and the actual name of the mod from the Nexus. Mod archives are packaged in three different ways that MO currently supports:
- Simple archive
- BAIN (Bash Installer)
- FOMOD (Fallout Mod)
If the archive is not packaged in any of the first three ways, it will open the manual installation dialog. Please note:
- Any time you install a new mod, it will automatically assume the highest numerical priority position. That means, once enabled by checking its box within the current profile, it will overwrite any conflicting mod files in a lower numerical priority position. To learn more, see the Priorities chapter.
- It is currently not possible to start multiple mod installs at the same time.
Manual Install[edit | edit source]
Any mod can be installed manually; it just takes a lot of work. You must read the mod's installation instructions to determine what files you need to put where. Most of the time, however, manual installation within MO's manual installation dialog is quite simple. When the manual installation dialog comes up, the first thing you should notice is the red text in the bottom left corner that says No game data at top level. The first time this happens, a little tutorial should appear and guide you through the manual installation workflow. Once the message at the bottom corner turns to a green Looks good, pressing OK will install the mod.
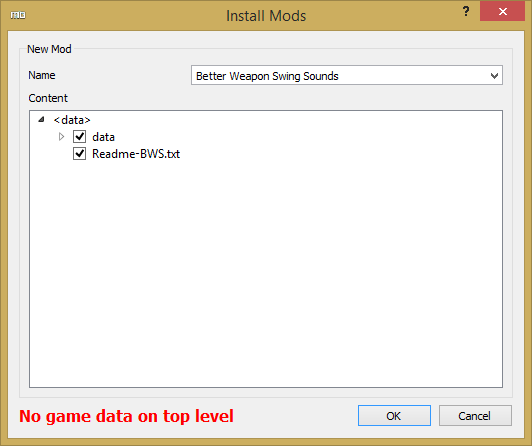 No game data on top level
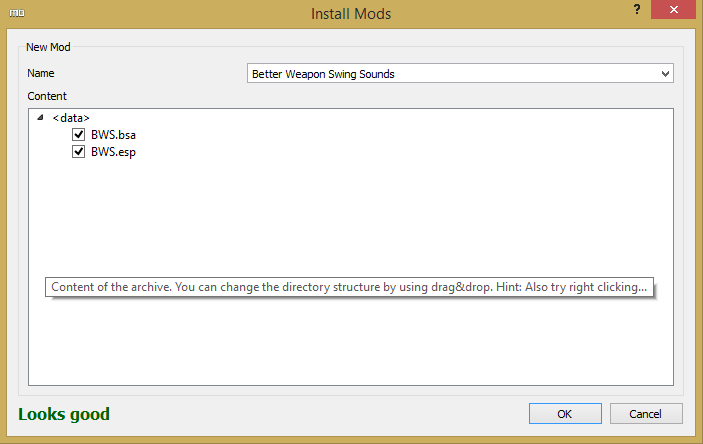 Looks good
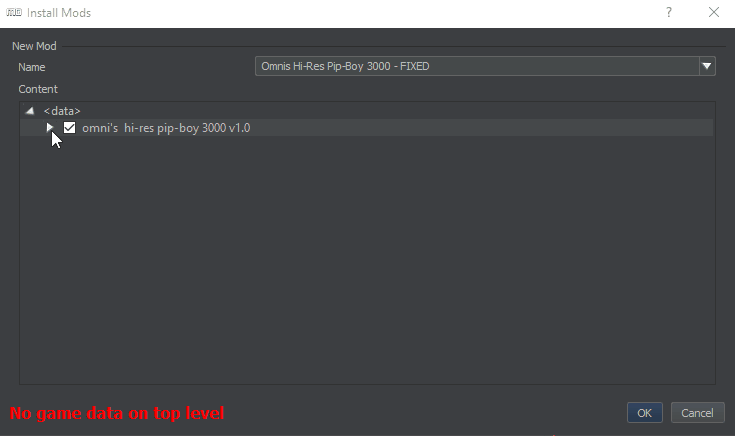
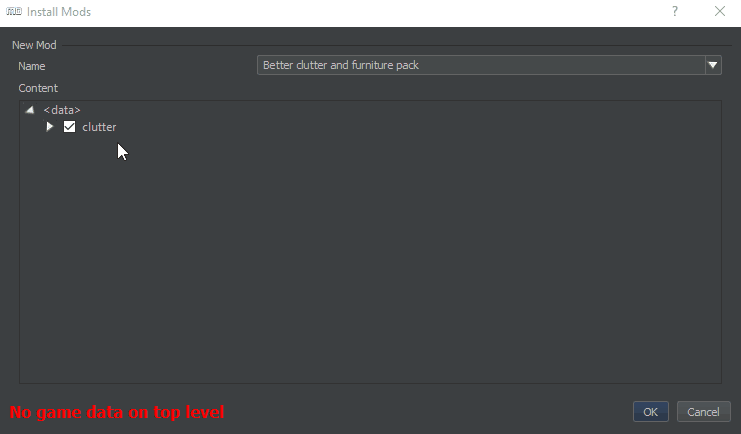
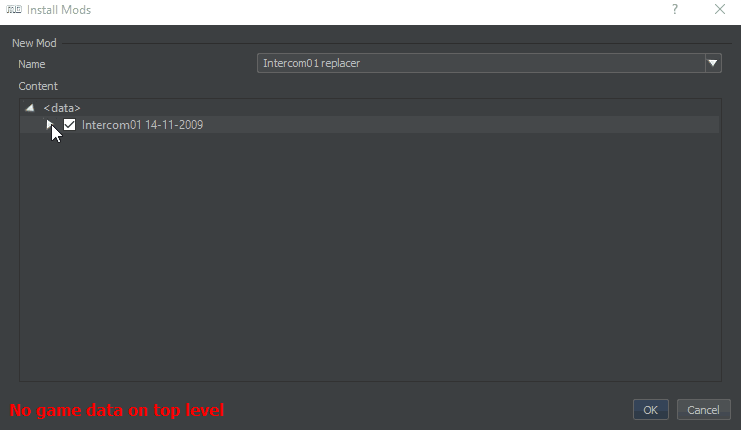
Most of the time when the manual installation dialog comes up, you'll see a data folder and a readme. In these cases, most of the time you can simply right-click the data folder, select Set data directory and install. If you set the wrong directory, simply right-click and select the Unset data directory option. Some archives may be more complex, and you may have to move files around into a common data directory to correctly install. Read the installation section and readmes to find out what goes where. You can open an included readme by right-clicking and selecting Open. You can create new folders within the manual installation dialog by right-clicking the directory level you want to place the folder and selecting Create directory. Some mods may require many directories to be created to place the file in the correct path. If you mess up, you can always modify it in the installed mod's Filetree tab. You can move files around within the manual installation dialog by dragging and dropping them within the appropriate directory. You can drag multiple items by Ctrl+clicking them. In order to not install a file/folder, simply uncheck the it.
Simple Install[edit | edit source]

The simple archive is naturally the easiest to install and thankfully is the most common. It presents you with a Quick Install window with only three options. The Manual button will open up the manual installation dialog. The OK button will install the mod. The Cancel button will cancel installation and close the dialog. Please note:
- Simple archive quick install functionality may be disabled by going to the Plugins tab inside Settings and setting the enabled value to false for the Simple Installer plugin.
- Simple archives may be installed automatically (saves a click by always using the OK option to install these mods) by going to the Plugins tab inside Settings and setting the silent value to true for the Simple Installer plugin. You may have to turn this feature off in cases where a mod might require you to install it manually despite being in the simple format.

BAIN Install[edit | edit source]
Bash Installer (BAIN) archives will open the BAIN Package Installer window. Check the options that you need (referring to the installation instructions on the mod's page or an included readme) and click OK to install. The Package.txt button will open up any package.txt file it finds in the mod archive. It will be greyed out if one does not exist. The Manual button will open up the manual installation dialog. The Cancel button will cancel installation and close the dialog.
FOMOD Install[edit | edit source]
FOMOD (Fallout Mod) installer archives will launch one of two FOMOD installation plugins depending on whether its script format is coded in XML or C#. XML FOMODs will launch the integrated installer plugin, which will initially extract the files and then present you with the FOMOD Installation Dialog. C# fomods will launch the external installer plugin, which will initially extract the files while presenting you with a window stating that it is running the external installer, and then finally present you with the installation dialog. Simply follow the wizard's instructions to install the mod.
Troubleshooting[edit | edit source]
Most of the time, you can simply follow the wizard instructions and everything will install correctly. However, sometimes one of the installation plugin may install the mod incorrectly, and then you may have to resort to an alternate installation method.
External FOMOD Plugin[edit | edit source]
There are two reasons why you may wish to force the external installer plugin (NCC) to install the FOMOD.
- The FOMOD does not install the correct files using the integrated plugin.
- The FOMOD uses a mod detection script using XML that only recognizes your installed mods using the external installer.
If for one of these two reasons you want to force NCC to install the FOMOD, do the following:
- Open Settings by clicking the wrench
 button in the toolbar.
 - Go to the Plugins tab.
- Click on FOMOD Installer.
- Double-click on the true value beside prefer.
- Select False from the drop-down list.
- Click OK.
It is recommended to re-enable the internal plugin to restore default behavior after successful installation of the problematic mod. This may be done by setting the prefer value back to true.
Fallout Mod Manager[edit | edit source]
FOMODs can sometimes be installed using Fallout Mod Manager (FOMM) by running it through Mod Organizer (MO) and creating a mod from the files it dumps inside Overwrite. Please note that FOMM was built for Fallout and may not work for other game FOMODs. Also note that it is preferable to use the default FOMOD installation plugin to using FOMM. For the Fallout games, install FOMM to the game directory in order for Mod Organizer to automatically add it to its list of executables. It may also be added manually by following the instructions in the Third Party Programs chapter. To install a FOMOD through FOMM:
- Ensure that your Overwrite directory is empty.
- Launch FOMM through MO.
- Click Package Manager. Select no to any popups.
- Click Add Package and browse to and select the FOMOD archive you wish to install. If it asks to make a copy, select no.
- Install the FOMOD with your desired settings, most likely selecting Yes to all to any conflicts, and exit FOMM.
- Right-click Overwrite, select Create Mod, enter the name of the mod, click OK and you're done.
NOTE
There were times when you MUST use FOMM to install some mods. Since version 1.2.17 these times are dwindling.Any mod that needs to recognize already existing mods can only do so when the VFS is active. As this is not the case when MO installs mods you will need to use the above method to install it correctly. Doing so will construct the VFS with all the currently active mods installed in their correct place. The newly installed mod will 'see' these mods and make the correct choices. Most notably these mods include HUD style mods that modify the menu files based on what is installed.
Steam Workshop Mod Installation[edit | edit source]
Despite lack of integration, Steam Workshop mods are not difficult to install into Mod Organizer.
- Ensure that Overwrite is empty.
- Subscribe to the mod on Steam Workshop.
- Open the game launcher through MO.
- Wait until all files are downloaded and exit the launcher.
- Right-click on Overwrite and select Create Mod.
- Name it whatever you want to call the mod and click OK.
- Unsubscribe from the mod on Steam Workshop.
- Rinse and repeat for all Steam Workshop mods you wish to install.
To update a mod from Steam Workshop in Mod Organizer, you must repeat the process again, removing the old version.
Updating[edit | edit source]
To check mods for updates, right-click within the Left Pane and select Check all for update. The success or failure of detecting all updates is dependent upon correct meta info for your mods (i.e., correct Nexus ID and version in the Nexus tab). Also, some mod authors use strange version systems that Mod Organizer may not detect. For this reason, it is wise to Track all your installed mods on the Nexus so you can refer to the tracking center for mod updates. To update a mod, download the new archive and install it to the same mod it was installed last time, replacing if it is a full replacement of the mod or merging if it only updates certain files within the mod. Make certain to assess any new file conflicts and prioritize accordingly (see the Priorities chapter).
Uninstalling[edit | edit source]
To uninstall a mod only from a given profile, simply uncheck it in the Left Pane. To uninstall a mod from all profiles, right-click the mod in the Left Pane and select Remove. The removed mod will be deleted to the Recycle Bin. In the event that the removal was an accident, going into the Recycle Bin and restoring the mod folder will restore it to Mod Organizer. However, it will be treated like a new mod, being unchecked and last in priority.
Enabling mods[edit | edit source]
Once a mod is installed in the Left Pane, it needs to be enabled and any plugins activated in order for it to show up in game. To enable a mod, simply tick its checkbox in the Left Pane for your current profile. It will be enabled only for your current profile. If you see a lightning icon in the Flags column, some of the mod files conflict with one of your other enabled mods. Go to the Priorities tab to learn how to resolve conflicts in the manner you desire. Multiple mods may be selected and enabled/disabled by Shift-clicking the first and then last mods of a contiguous group or Ctrl-clicking mods individually. Once the group of mods is selected, hit Spacebar to toggle the state of those mods.
Activating mod plugins[edit | edit source]
Once a mod is installed and enabled, any plugins that the mod contains needs to be activated for them to show up in game. To activate a mod plugin, go to the Plugins tab in the Right Pane, find the plugins you desire to activate and tick their checkboxes.
Priorities[edit | edit source]
Priorities is a concept developed by Mod Organizer (MO) to manage conflict resolution between mod files. This eliminates many of the traditional functions of replacing other mod files with another mod's files by instead arranging it so that mods in higher priority overwrite mods in lesser priorities without actually replacing the other mod files.
Conflict Resolution[edit | edit source]
Every time you install a mod, it automatically gains highest priority and will provide all conflicting files once enabled. The higher the priority number, the higher priority is given to the mod. If you wish another mod to provide the conflicting files, you must either drag and drop that mod into the higher priority position or drag and drop the freshly installed mod into a lower priority position. Alternatively you can click the mod's priority number, hit F2, change it to a different priority number, and hit enter. You can also CTRL+click and shift+click multiple mods to move many mods into a different priority position. Most times, changing priorities will be all the conflict resolution you will need. Nevertheless, advanced mod users may desire more advanced control on conflict resolution. If you have two mods that overwrite different files from each and you prefer some from both, you can Hide the files from the mod you do not want to provide the files to cause the other mod's files to be used. This may be accomplished in either the Conflicts or the Filetree tab within the Mod Information window by right-clicking the file to be hidden and selecting Hide. Hiding a file appends a ".mohidden" file extension to the file so that it will effectively not show up in game.
BSA Priorities[edit | edit source]
BSA files are archives that contain assets including textures, meshes, sounds, and scripts. All vanilla data resides in BSAs, and by default, the Skyrim Creation Kit packages assets for mods in BSAs. Traditionally you can not control priority between BSAs and loose files (that is: assets that came as individual files) as BSAs were always overwritten. Therefore, if you wanted to use files from a BSA to overwrite files from a mod that came as loose files, you would have to delete the conflicting loose files manually.
Mod Organizer (MO) adds a feature that changes this. When Have MO manage archives is checked in the Archives tab, all BSAs are treated exactly as if they were loose files. That means their priority depends solely on the mod priority order and not the plugin priority order (load order). Additionally, checking a BSA in this mode allows the BSA's assets to be loaded without the need for a dummy plugin. This means that you can, for example, load the Skyrim High Resolution Texture Pack by checking the BSAs and unchecking the plugins, effectively saving you three plugin slots.
MO's BSA management however, makes mod priorities more important. If asset conflicts are not handled correctly, problems may ensue. Because of this, MO catergorises all mods/DLCs in the real Data directory that contain BSAs into the Left Pane as Non-MO mods. They will be prefixed with: Unmanaged:.
This enables proper conflict resolution even though some assets where installed outside of the MO program.
An example of this would be the Skyrim Dragonborn DLC and Unofficial Skyrim Patch. If you had installed the Unofficial Skyrim Patch and had it after the Dragonborn DLC (which will be shown in the Left Pane as Unmanaged:), the dragonactorscript.pex would incorrectly overwrite the Dragonborn version, causing the user to not be able to absorb Dragon souls. Unofficial Skyrim Patch must be in a lower priority than Dragonborn for this to be fixed. The user should load the Non-MO mods to as low a priority as possible while maintaining proper conflict resolution. A good guide to this is observing your load order. The DLCs and any mods loaded between them should generally mimic this load order in order for the correct assets to be used.
MO's BSA management may be turned off by unchecking the Have MO manage archives option. If you decide to do this, please note that you will have to load BSAs through dummy plugins. The game's built-in BSA versus loose files rules will apply, and BSAs will be loaded in plugin load order.
Warnings[edit | edit source]
Potential Mod Order Problems[edit | edit source]

Sometimes the toolbar will show the warning ![]() icon to indicate there are issues with the order of mods in the Left Pane. Clicking that icon will show the 'Problems' that need to be addressed and highlighting the 'Potential Mod order Problem' in the top panel will show a description of the needed changes in the bottom panel similar to the image at the right.
It is generally the best option to just click Fix and let Mod Organizer reorder those mods, however if you have made a large number of changes or even a wholesale reinstall of ALL your mods, you may want to try sorting them manually first.
If you choose to manually reorder these mods try working from the bottom up of the listed mods as this may also eliminate some of the same conflicts for higher listed mods.
icon to indicate there are issues with the order of mods in the Left Pane. Clicking that icon will show the 'Problems' that need to be addressed and highlighting the 'Potential Mod order Problem' in the top panel will show a description of the needed changes in the bottom panel similar to the image at the right.
It is generally the best option to just click Fix and let Mod Organizer reorder those mods, however if you have made a large number of changes or even a wholesale reinstall of ALL your mods, you may want to try sorting them manually first.
If you choose to manually reorder these mods try working from the bottom up of the listed mods as this may also eliminate some of the same conflicts for higher listed mods.
What could go wrong?![edit | edit source]
As the dialog box shows, and the title of this page indicates, these are potential problems. Usually your game will still run and you may not experience any CTDs, or other problems, but you will most likely have missing textures/meshes/etc., or at the very least the wrong ones. This feature of Mod Organizer is akin to a reminder of the instructions that might be seen on the mod authors' pages about which mod to install and in which order. As ALL mods are "installed" in to Mod Organizer's virtual game data directory, the actual order that they get loaded by the game engine can be modified by reordering those mods in the Left Pane.
NOTE
It is important to note that, while these are problems to do with 'mod order', they are not of the same nature as those handled by MO's Sort or by 3rd party programs such as LOOT or BOSS.
The order here is related to the assets contained such as textures/meshes/menus/etc. whereas Sort handles the esp/esm files or plugins.Overwrite[edit | edit source]
What is Overwrite?[edit | edit source]
In the Left Pane of Mod Organizer, if you sort by Priority ascending, at the very bottom of your mods (in other words, with the highest priority), you will see Overwrite in italics. This is the Overwrite directory (also known as Overwrite folder, Overwrite mod, or simply, Overwrite). Double-clicking will show you the contents. It is always the last thing priority-wise, so anything inside it will overwrite any conflicting mods, hence the name. In the normal Windows file system, the Overwrite directory exists in <ModOrganizer>/Overwrite. It should not be confused with the real game data directory or the virtualized game data directory. The real game Data directory existing in <path-to-game>/Data. The virtual game data directory for the game doesn't exist anywhere in the Windows file system; it is virtual. It can be seen virtualized in Mod Organizer's Data tab in the Right Pane. Overwrite is the place that MO dumps all generated files that otherwise would be dumped into the real game data directory. This is true for any tool or mod that is run through MO as long as the file being generated does not already exist in one of your enabled mods or in the real game data directory. If the file already exists in one of your enabled mods or in the real game data directory, it may or may not replace the changed file or create a new copy "overwriting" it in Overwrite, depending on how the tool/mod modifies the data.
How files end up in Overwrite[edit | edit source]
Any application launched through Mod Organizer (MO) that makes changes to files will be handled as follows (This is an excerpt from a PM from Tannin):
- If the application deletes a file, MO does not intervene. The file is deleted from the VFS and if there are multiple files by the same name the one in the highest priority mod gets deleted from disk. BUT all other files by the same name (in other mods) stay around so the next time the VFS is started, the file may exist again (provided by a different mod)
- If the application moves a file to outside the VFS (Skyrim/data) MO doesn't intervene
- If the application moves a file into the VFS and the absolute target filepath (that is: the whole virtualised path including filename, i.e. .../Skyrim/data/someplugin.esp) matches the absolute filepath of a file recently deleted (5 seconds I think) MO will move the file instead to the mod from which the file was previously deleted.
- If the application moves a file into the VFS and the filepath doesn't match a deleted file, the file goes to the overwrite directory.
- If an application creates a new file, the same rules apply as for the move: If there was a file by the same name deleted recently, the new file goes to that mod, otherwise it goes to overwrite.
Tools that may generate files in Overwrite:
- Automatic Variants (This SkyProc Patcher will remove all AV Package files and move them to overwrite and create a Automatic Variants.esp plugin. You will have to reinstall your packages if you deleted this generated output.)
- Creation Kit (only when creating new files)
- Fallout Mod Manager (FOMM)
- Fore's New Idles in Skyrim (FNIS)
- Realistic Colors and Real Nights (every time the RCRN Customizer is run)
- SkyProc Patchers (may vary between different patchers)
- Script Extender plugins (if they create a file(s) and only if the file(s) do not already exist). Some specific plugins:
- Fuz Ro D-oh will create an INI file upon first run of Skyrim with it active. Move it to your Fuz Ro D-oh mod and it will no longer appear in Overwrite. You may edit this file in the INI-Files tab for the mod.
- RaceMenu CharGen extension (All character presets will be moved into Overwrite. Additionally, each Skyrim run it will generate .tri files in a meshes/cache folder that will be written to Overwrite used as a cache. These .tri files may safely be deleted.)
- SKSE-Elys-AltF4 will create a log file upon first run of Skyrim with it active. Move it to your SKSE-Elys-AltF4 mod and it will no longer appear in Overwrite and instead will write to that location.
- Smart Souls will create an INI file upon first run of Skyrim with it active. Move it to your Smart Souls mod and it will no longer appear in Overwrite. You may edit this file in the INI-Files tab for the mod.
- TES5Edit (only if the file does not exist or if Backup Plugins is checked)
- Wrye Bash (When creating bashed patches and ONLY on the first run OR if the bashed patch is disabled when rebuilding)
What does this all mean?[edit | edit source]
Simply put, if you want to use a tool to work on mods from inside MO they, the mods, MUST BE ENABLED. The VFS will only 'see' files that are enabled and hence any tool operating in that VFS will likewise 'see' them only if enabled.
Let's take a typical scenario.
You have followed the instructions for building a bashed patch using Wrye Bash and now you want to rebuild it.
If the bashed patch is enabled/activated before you run Wrye Bash, the newly rebuilt patch will not be found in the Overwrite folder but instead will replace your first patch in its mod.
If the bashed patch is disabled/deactivated before you try to rebuild it then MO will not have that mod added to the VFS and after the new patch is created, the only place it can go is into the Overwrite folder.
Maintaining a Clean Overwrite[edit | edit source]
Overwrite should be kept empty. This may require you to move files out of Overwrite. Every time you run the game or a tool through Mod Organizer, check Overwrite. If there are files present, right-click Overwrite and select Create Mod. Name it according to whatever tool or mod generated the file and activate it for your profile. Upon successive generations of the tool, move the files back to this mod, replacing all. This is accomplished by double-clicking Overwrite, highlighting the files to be moved, and dragging and dropping them onto their mod.
Advanced[edit | edit source]
For a discussion of more advanced topics related to Mod Organizer, please see Guide:Mod Organizer Advanced.
Adjusting Steam App ID[edit | edit source]
MO automatically fills in the Steam App ID based on the managed game:
- Skyrim: 72850
- Fallout NV: 22380
- Fallout 3: 22300
- Oblivion: 22330
If the game or Steam tool does not launch correctly, you may need to adjust the Steam App ID. This is rare. To locate the correct Steam App ID:
- Open Steam and go to the Library.
- Right-click on the game and choose Properties.
- On the General tab click the CREATE DESKTOP SHORTCUT button and select OK at the prompt.
- On the desktop, right-click the shortcut and select Properties.
- The URL field will say something like
steam://rungameid/202480. The number is the SteamAppID (the number example here is for the Creation Kit).
Notes:
- The Fallout 3 Game of the Year version's Steam App ID is 22370. This may fix crashing on Fallout 3 if you are using the that version.
- Skyrim's Creation Kit's Steam App ID is 202480. If the Steam App ID is not set in the Configure Executables window with Overwrite Steam AppID checked with the value of 202480, the Creation Kit will not be able to see your mods.
- Extensive info on Steam App IDs can be found in this thread: The Elder Scrolls Series and Fallout Series App ID's (By Uhuru).
FAQ[edit | edit source]
Q: What do I need to do to backup my MO installation?
- A: The folders that need to be backed up before doing a reinstallation are:
- downloads - which contains all the archives from Nexus,
- mods - this holds the "installed" mods that are listed MO's left-hand pane;
- profiles - this has all the Profiles you have defined, including any saved games. (if you chose that option).
- Additionally, if you have made any changes to Catergories these will be found in the categories.dat file.
Q: Why does my <skyrim>Data folder not show any mod files? Where are the mods?
- A: Mod Organizer installs each Mod into its own folder. The default location is
<ModOrganizer>/Mods/. Only official Bethesda files from Skyrim, Dawnguard, Hearthfire, Dragonborn, High Resolution Texture Pack and Creation Kit are in<skyrim>Data. Mod Organizer creates a virtual filesystem (VFS) which combines the official Skyrim data content at<skyrim>Datawith all the mods in<ModOrganizer>/Modsthat are currently activated for the profile being used at runtime. It is the main feature of Mod Organizer and keeps<skyrim>Datapristine and untouched!
Q: I want to use MO for some games and NMM (or any other manager) for some other games. How do I do this?
- A: Run the NXMHandler executable, found in the MO folder, and [right-click] in an empty space and select "ADD". All MO supported games are listed and if the game you want is not listed (e.g. Witcher 3) simply select 'Other' and then navigate to, and select, the binary that is used by the other manager.
Double-clicking on the executable's field will allow you edit it, allowing you to use any other manager, even for MO supported games.
Q: I installed a mod and it's not working!
- A: How do you know it's not working? The only reliable indicator is the game! The Skyrim launcher does not show mods installed through MO. The data directory does not contain new files. After installing a mod, start the game and see if the mod did what it said. If you did and the mod is really not working, please verify that the directory structure is correct. Many mods are not packaged for easy installation so you may have to shift files around (either during installation or after).
Q: I'm having trouble installing certain mods with FOMODs. How can I fix this?
- A: FOMODS that use the C# style script, such as SkyUI, need to have the correct .NET Framework, follow the instructions in the Prerequisites section
Q: How do I find out if MO is working?
- A: Install a mod with a visible impact! Also, check that modorganizer.log gets created.
Q: How to see MO's virtual filing system (VFS) in action
- A: Use Free Commander or any other suitable windows file manager. For details see 'Free Commander' in the Third Party Programs chapter.
NOTE
Files contained inside BSAs are not shown in the file/folder structure as noted in the guide above.Q: Why does Overwrite gain .tri files in a meshes/cache folder ever time I run Skyrim?
- A: These are files created by RaceMenu's CharGen extension. It is safe to delete them if you wish, as RaceMenu itself deletes these files and generates new ones every run.
Q: Which load mechanism should I use?
- A: Please use the default unless you have a problem with it. If you have a Script Extender installed and do not want to use the Mod Organizer UI, you can use the Script Extender load mechanism. However, be aware that Script Extender Plugins installed through MO will not work if you do this. You will have to manually install them to the data directory. Also, whenever the game is updated, SE will stop working and with it MO.
- Use Proxy DLL only as a last resort. Also, keep in mind that when using proxy DLL you have to start MO at least once after every game update! Oblivion works best with the Script Extender load mechanism works. Skyrim works best with the Mod Organizer load mechanism.
Q: I'm using the proxy-dll loading mechanism and now MO/Skyrim does not work anymore.
- A: I do not know how this happens, but it's easy to fix. Follow the following steps closely:
- First, deactivate proxy-dll loading in MO then close it.
- See what size the steam_api.dll in your Skyrim folder has. If it's around 116 kb, delete steam_api_orig.dll
- If steam_api.dll is ~11kb, you delete steam_api.dll instead. Then you rename steam_api_orig.dll to steam_api.dll
- In both cases you end up with a steam_api.dll that is around 116 kb and no other file called steam_api
- Now start MO again and re-activate proxy-dll
Q: Can I install SKSE or SKSE scripts via MO?
- A: You cannot install SKSE as a mod via MO as then SKSE scripts will not load. You can install SKSE scripts as a mod in MO.
Q: Can I install ScriptDragon and its scripts via MO?
- A: You cannot install ScriptDragon as a mod via MO as it is a no go at the moment. You may be able to install ScriptDragon scripts as a mod in MO if they go into the data directory or
<skyrim/Data/asidirectory
Q: Can I install ENB mods or its assets via MO?
- A: You cannot install ENB as a mod via MO. If an ENB has additonal assets like Shaders and Textures you can install those as a mod in MO.
Q: Can I install SweetFX Shader Suite mods or its assets via MO?
- A: You cannot install SweetFX Shader Suite as a mod via MO. Unknown to me but if there are sweetFX based mods which have additonal assets like Shaders and Textures you can install those as a mod in MO.
Q: Can I use a PS4, XBOX or Steam controller with MO?
- A: According to a Reddit thread you can but you must have MO installed WITHOUT Admin privileges.
Q: Can I install FXAA Post Process Injector or its assets via MO?
- A: You cannot install FXAA Post Process Injector as a mod via MO. Unknown to me but if there are FXAA Post Process Injector based mods which have additonal assets like Shaders and Textures you can install those as a mod in MO.
Q: Can MO automatically check for mod updates?
- A: MO does not automatically check for updates, as the author does not want to cause unnecessary spam to the Nexus. However, you can right-click the mod list and select Check all for update. This will check all mods for the newest version and mark those in red that have an update available.
Q: Why does MO still say I am 'not logged in'?
- A: Related to the previous question, MO does not automatically poll the Nexus site to check on these details. After you have entered your account details they will stay saved in MO's settings UNTIL you have actually used them. Perform the same action as described above and notice the titlebar change.
Q: Why is the endorsement flag not set after I install a mod?
- A: For technical reasons the plugins which install a mod cannot set that flag. Go to the Left Pane of MO, right click and select 'check all for updates'. This will also set the endorsement flag.
Q: Why does MO not allow me to "Query Info" on the mod I downloaded?
- A: It depends on the mods involved, Nexus only allows for a maximum of 30 files to queried by MO at any one time, if the download page for that mod has more than that then the correct name may not be amongst the 30 answers given. You will have to manually check the naming schema yourself and adjust accordingly. It may also pay to ask the mod author to clear out the downloads page.
Q: I set Mod Organizer to automatically extract BSAs, and now I want to change this. How do I reset this setting?
- A: Go to the Settings menu by clicking the wrench button in the toolbar. Click Reset Dialogs and click yes at the prompt.
Q: My MO window keeps resetting itself to a small window even though I resize it. How do I fix this?
- A: Go to the Settings menu by clicking the wrench button in the toolbar. Click Nexus and unselect 'Use HTTP Proxy (Use System Settings)'.
Q: I want to uninstall MO, what do I do?
- A: First, inside MO, go to Settings and select Mod Organizer for the load mechanism. Close MO and then just stop using it.
- You can delete the ModOrganizer directory if you're sure you need nothing from it anymore (like mod archives). Beyond that, no uninstallation is necessary. MO does not write to the registry or into any directory besides its own.
- Note: The NXM association is still active, see 'Fixing NXM Issues' in the advanced guide on how to correct that.
Q: I want to report a bug!
- A: Very good, but please provide as much information as possible. Keep in mind that I use MO constantly and unless your bug is very new, I did not encounter it yet, so you'll have to help me reproduce your situation.
- Use the bug reporting mechanism on this site: Issues List and click on New Issue at top of page and ensure you add the appropriate tags.
Q: I want to ask for a new feature or enhancement, please
- A: Use the feature request mechanism on this site: Issues List and click on New Issue at top of page ensure you add the appropriate tags.
Q: How can I contact the Author of MO?
- A: If you want to contact me, please use the Forum or send an eMail to sherb at gmx.net